HELP DOCUMENTATION
Magento Extension for Zoho Desk
Ecommerce has become a requisite for all business categories. Every online business owner looks for a sophisticated ecommerce solution that offers a blend of scalability, flexibility, and extensibility. Magento is one of the best choice for ecommerce store. In addition, you have the flexibility and ease to customize your online store according to your brand at a fast pace.
It also offers product, category, inventory and order management, process payments, promotion & marketing tools for your store.It is the perfect CMS for web store that offer complete ecommerce solution.
Objective of the Integration
Our extension allows you to seamlessly integrate between your Magento store with ZohoDesk account in a jiffy through eWidget and get the particular customer's order details & view it inside the Tickets and Customers without navigating to the Magento account.
By using our extension helps your support agents to proactively reach out to your customers to find out their problems with the order and win them back where possible.
Key features of these Integration:
- View your customer's order,payment,shipment and the rest of their details (including price, quantity, and notes) without leaving the Zoho Desk interface.
- Real-time single direction synchronization of your Magento store orders,payment & shipment data into Zoho Desk.
- Any changes in Magento store order status will automatically update the same status in our extension.
- Map navigation for billing and shipping address right from the Zoho Desk.
- You can add comments to orders and shipments through our extension; these comments will also be reflected in Magento.
- You can also add the order details and shipment details in the "Reply All" template through our extension in Zoho Desk.
Installing the Extension in Zoho Desk
End users of the ZohoDesk can view and install the published public extension in two ways:
- Marketplace option in the SETUP section within Zoho.
- Install it via Zoho Marketplace
If the Zoho Desk administrator installs an extension from the Setup page, the extension is made available to users in the current portal. On the other hand, if the administrator tries to install the extension from the Marketplace site, a list of all the available portals appears, letting the admin choose the one in which the extension must be installed.
Setting up the Zoho Desk & Magento Integration:
Getting the Magento Integration tokens and Access token:
Use the following steps to generate an access token:
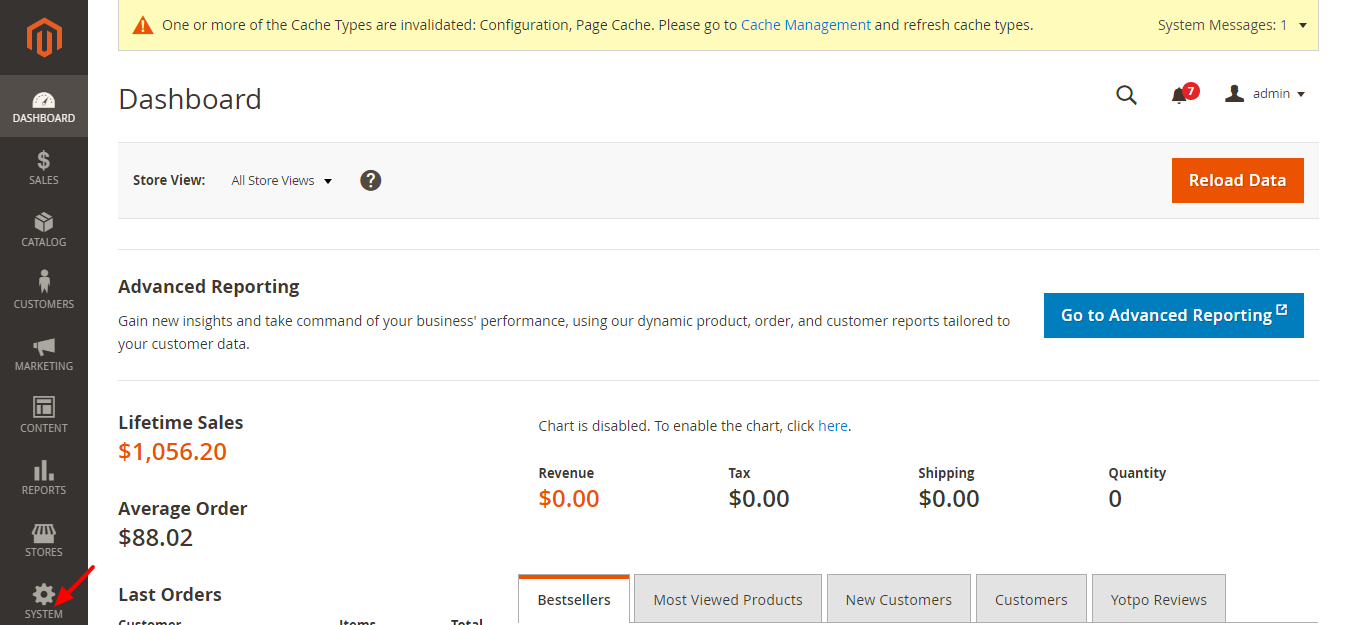
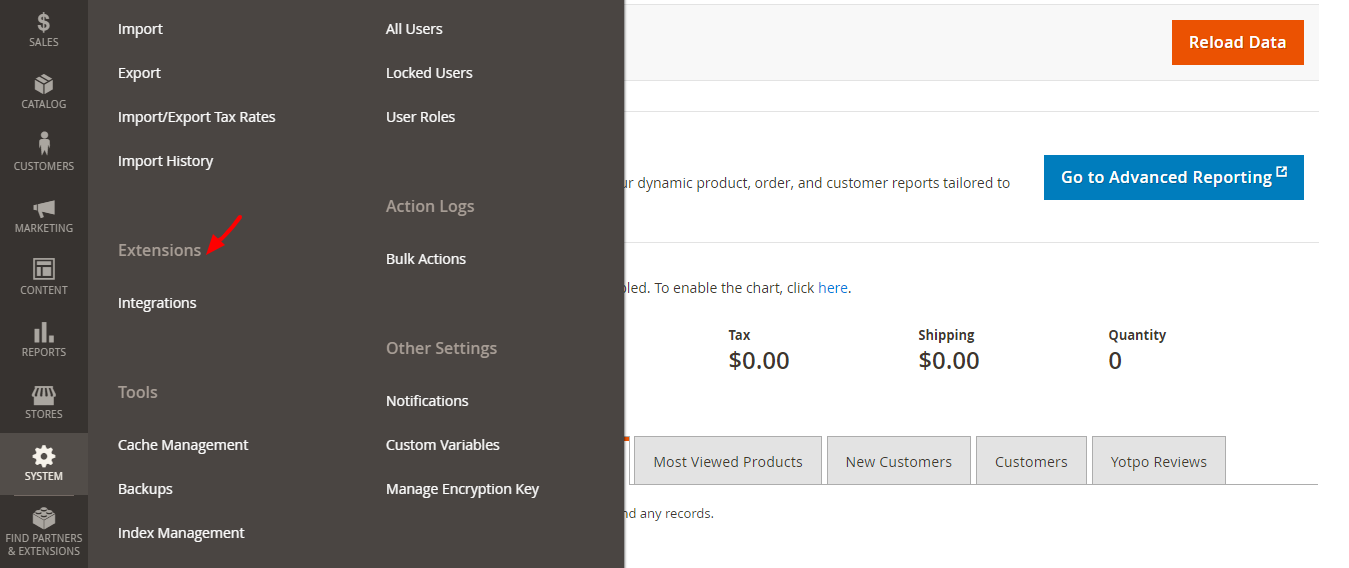
- Login into ADMIN URL and click System > Extensions > Integrations to display the Integrations page.
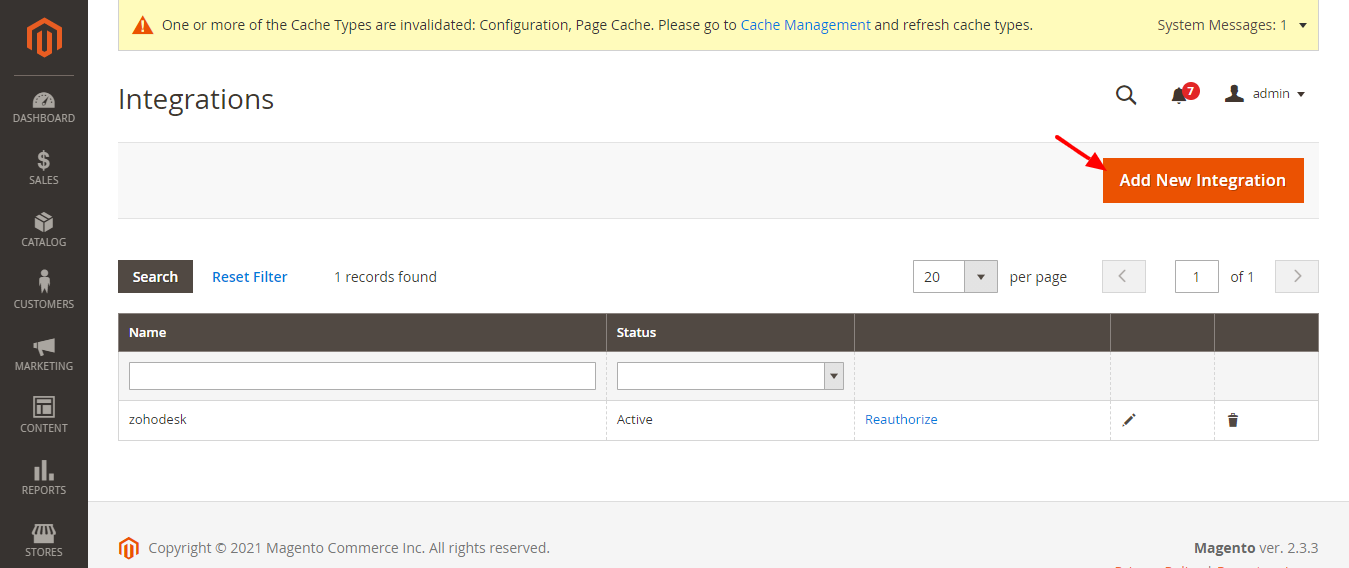
- Click Add New Integration to open the New Integration page.
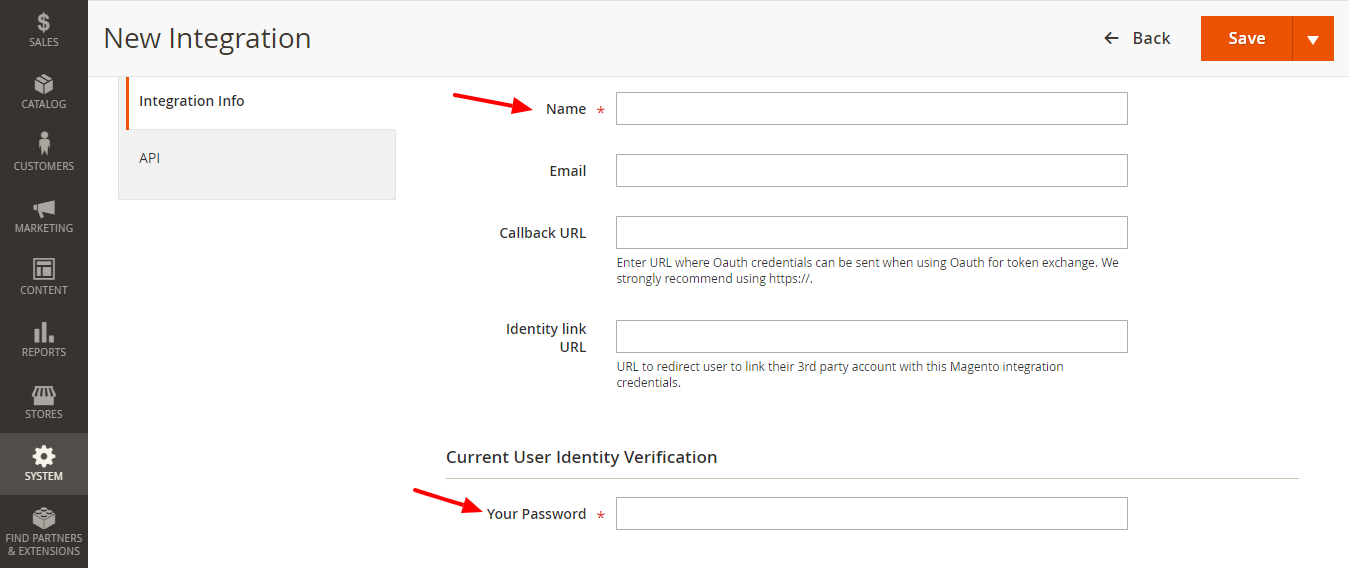
- Enter a unique name for the integration in the Name field. Then enter your admin password in the Your Password field. Leave all other fields blank.
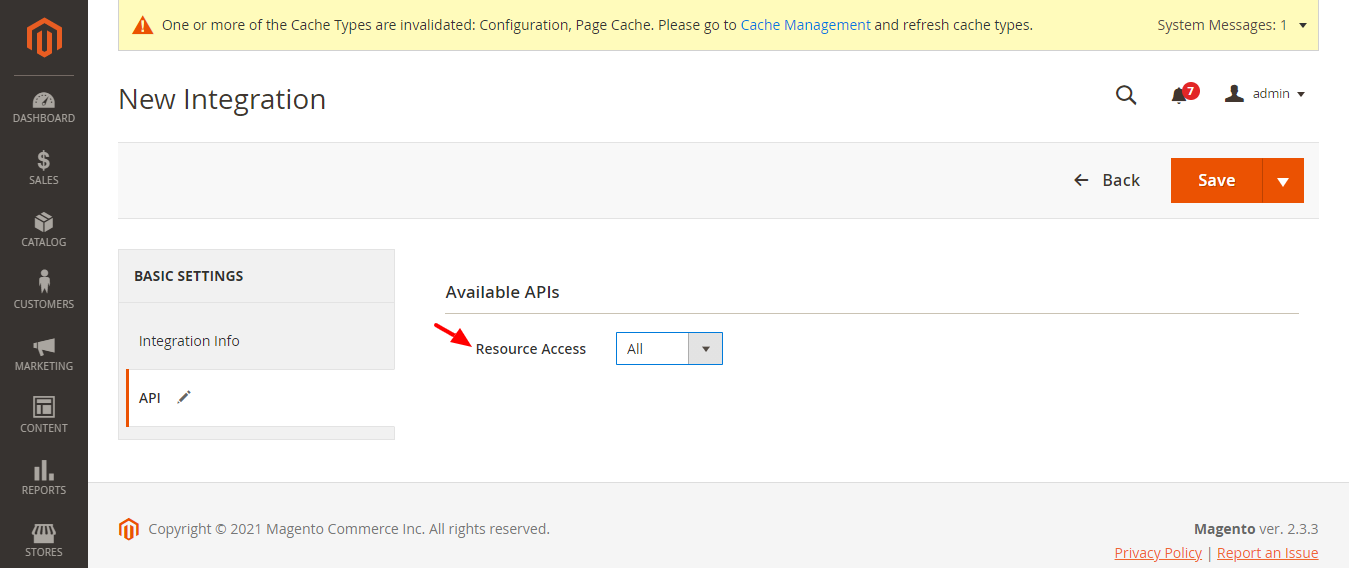
- Click the API tab. Select the Magento resources the integration can access. You can select all resources, or select a custom list.
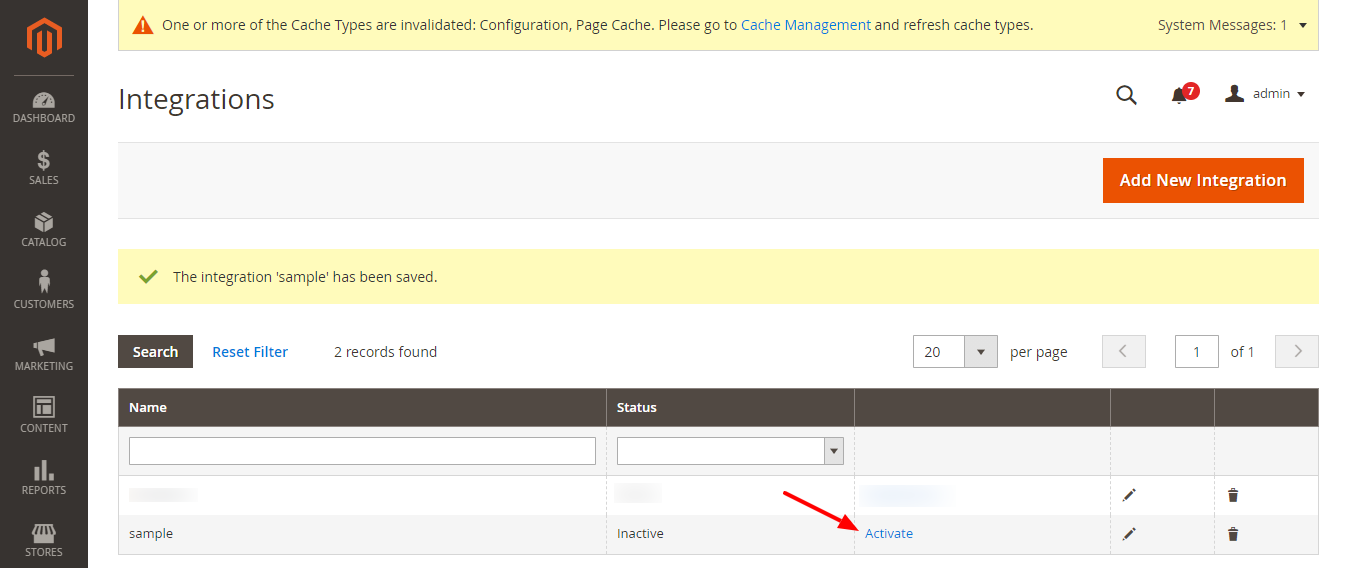
- Click Save to save your changes and return to the Integrations page.
- Click the Activate link in the grid that corresponds to the newly-created integration.
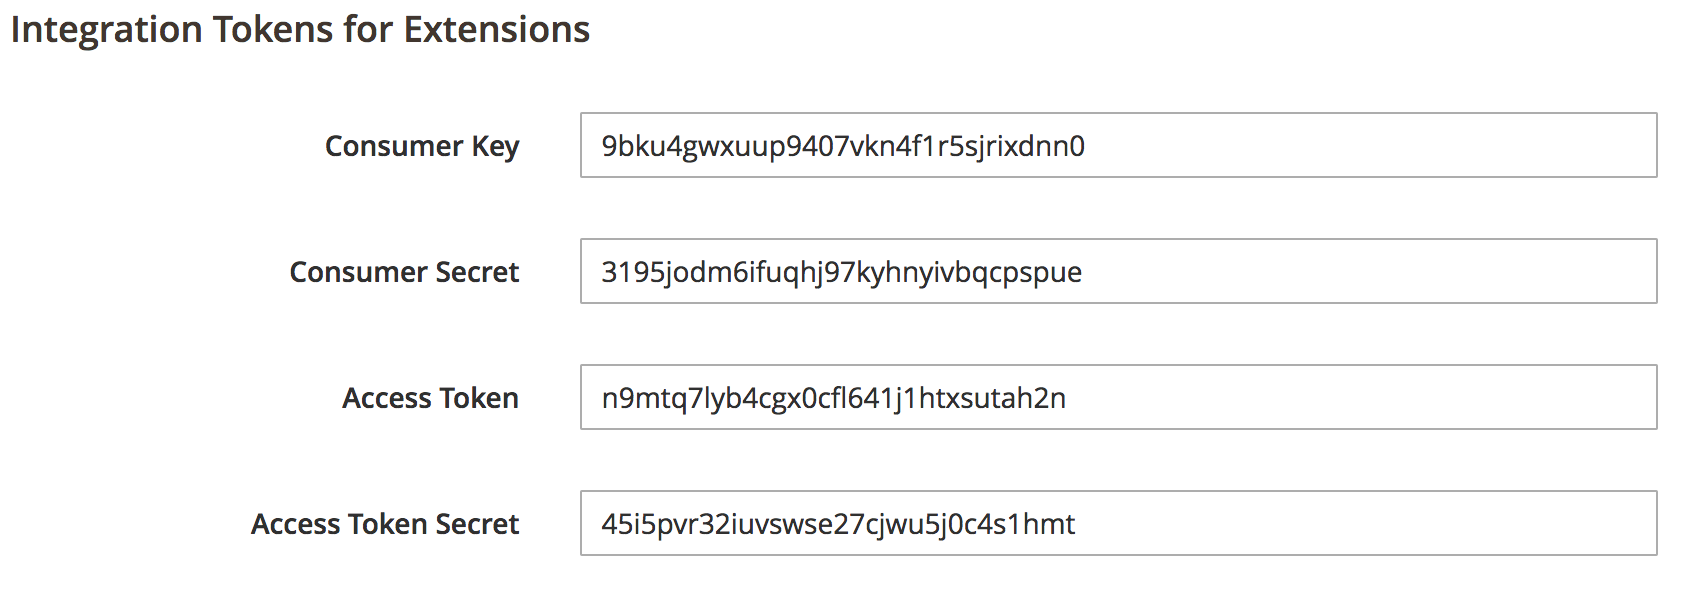
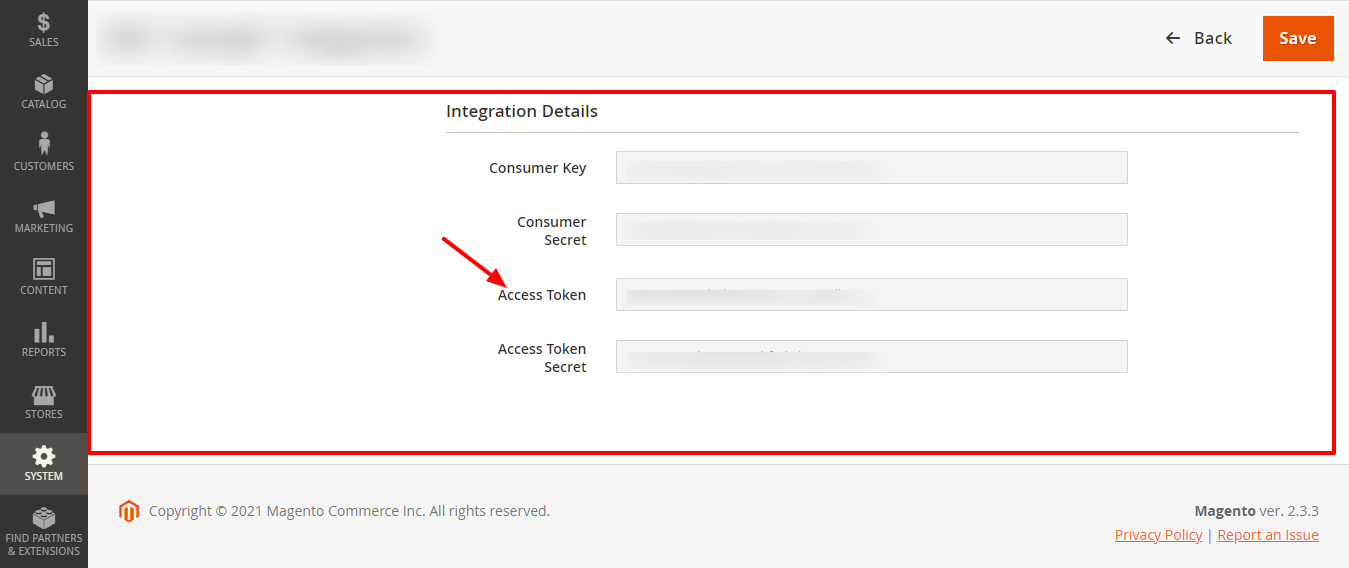
- Click the Allow button to get the integration details page.
Granting OAuth Access for Extension Connection in Magento Admin Panel
Follow these steps to grant OAuth access :
Note : To ensure visibility of orders in our eWidget, OAuth access needs to be granted in Magento for accessing order details.
Note : If OAuth access is already enabled, there is no need to follow the steps below.
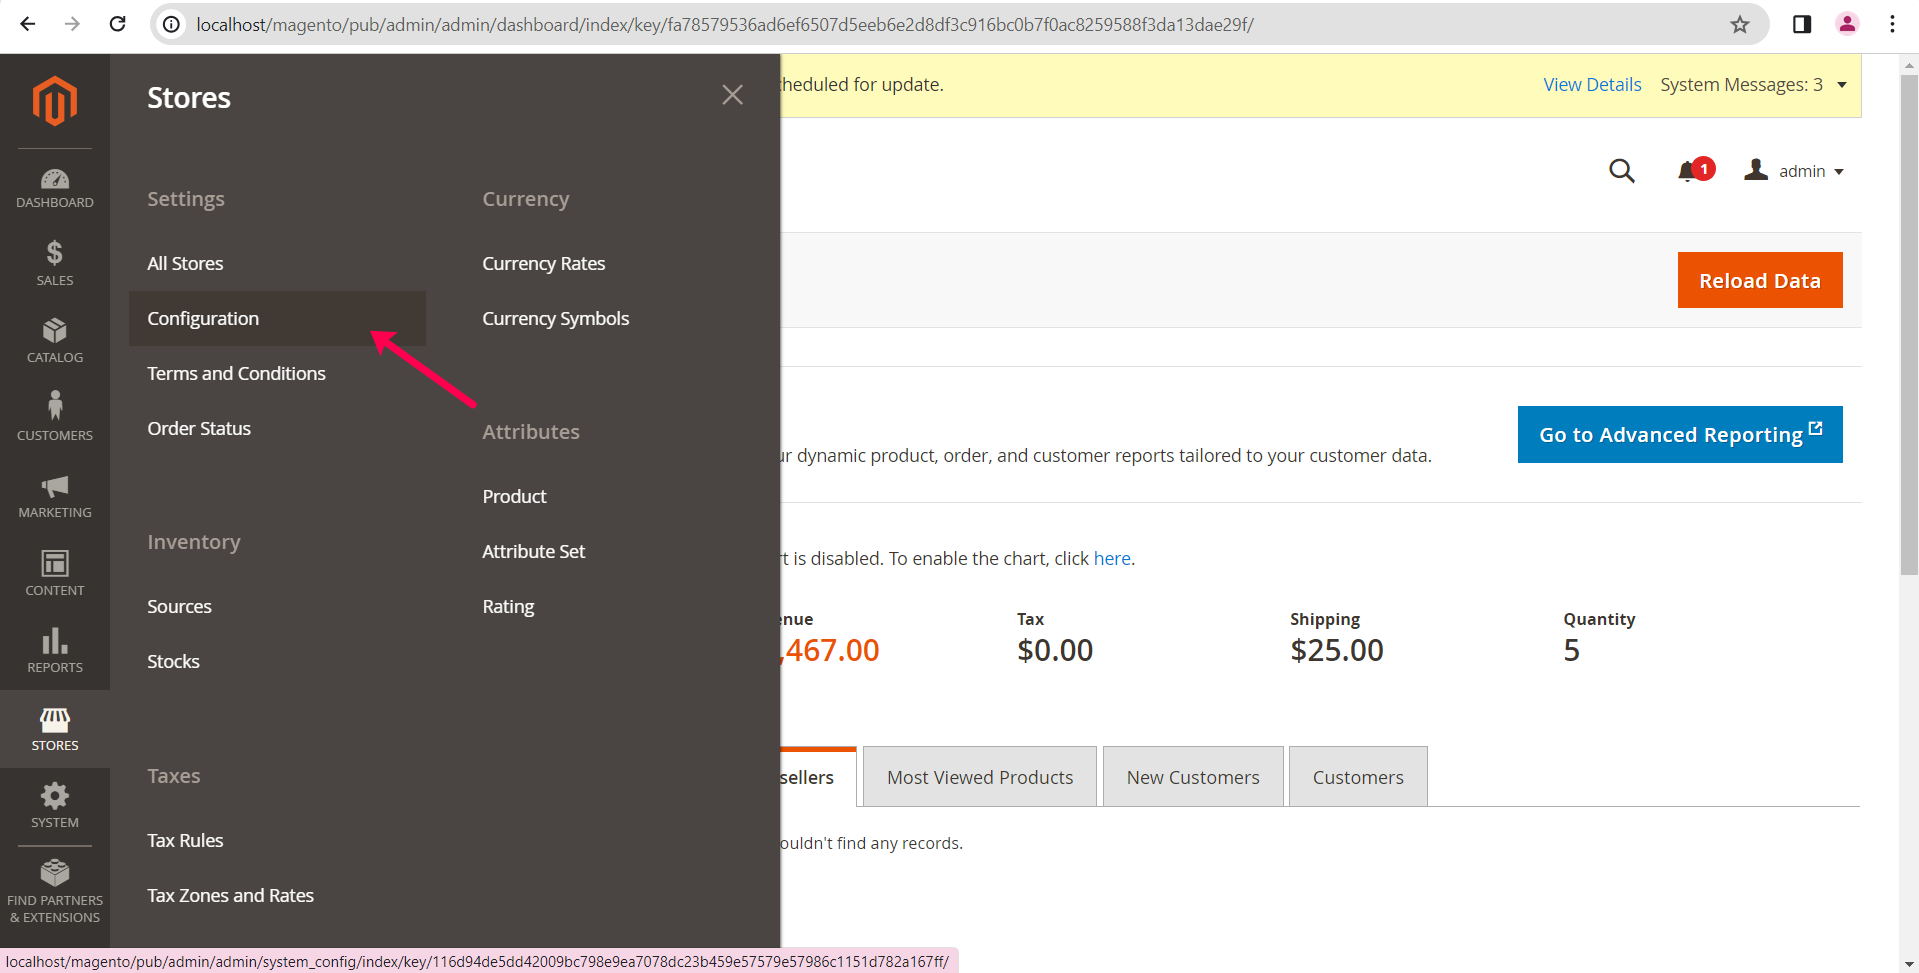
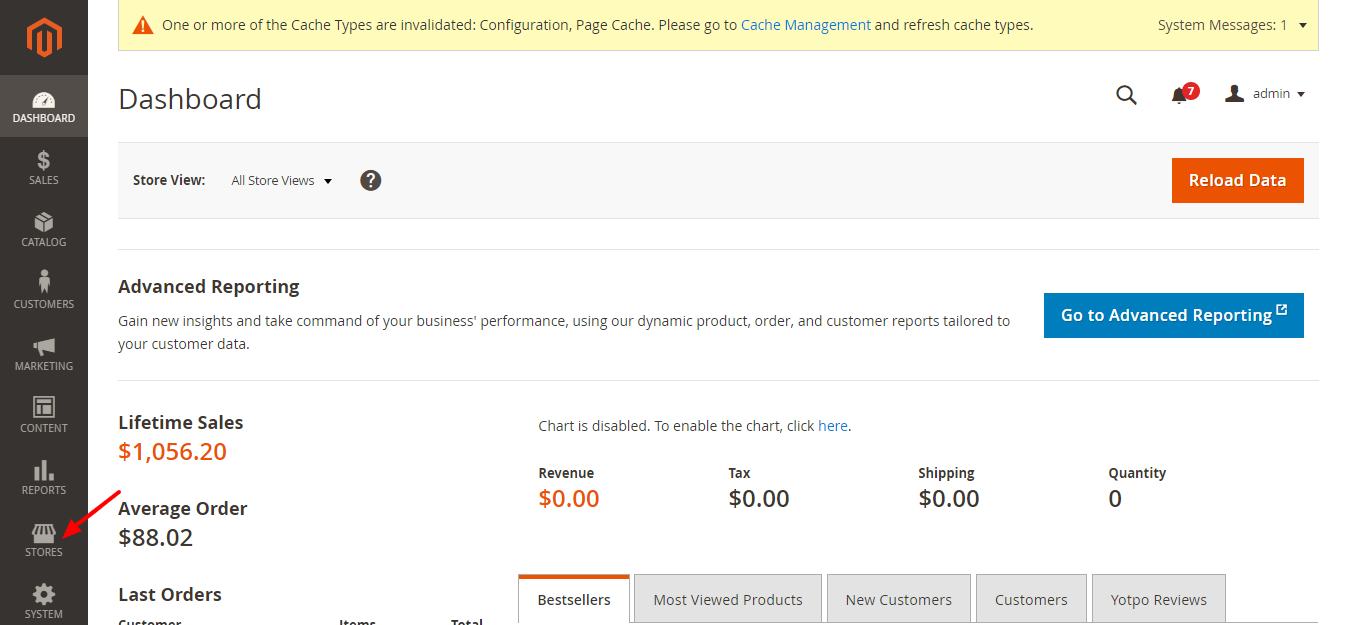
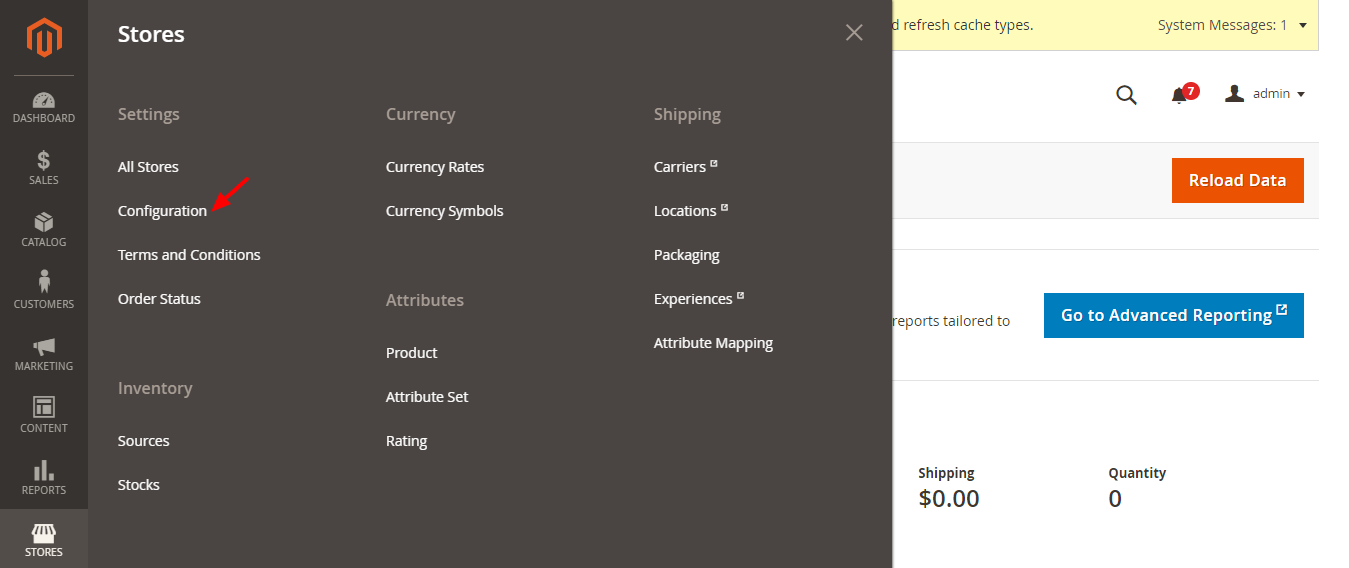
- Navigate to the Magento Admin panel. In the sidebar, locate and click on the STORES option. This action will open a side panel. Within the side panel, you'll find the Settings section. Click on Configuration under this section, and it will navigate you to Configuration tab.
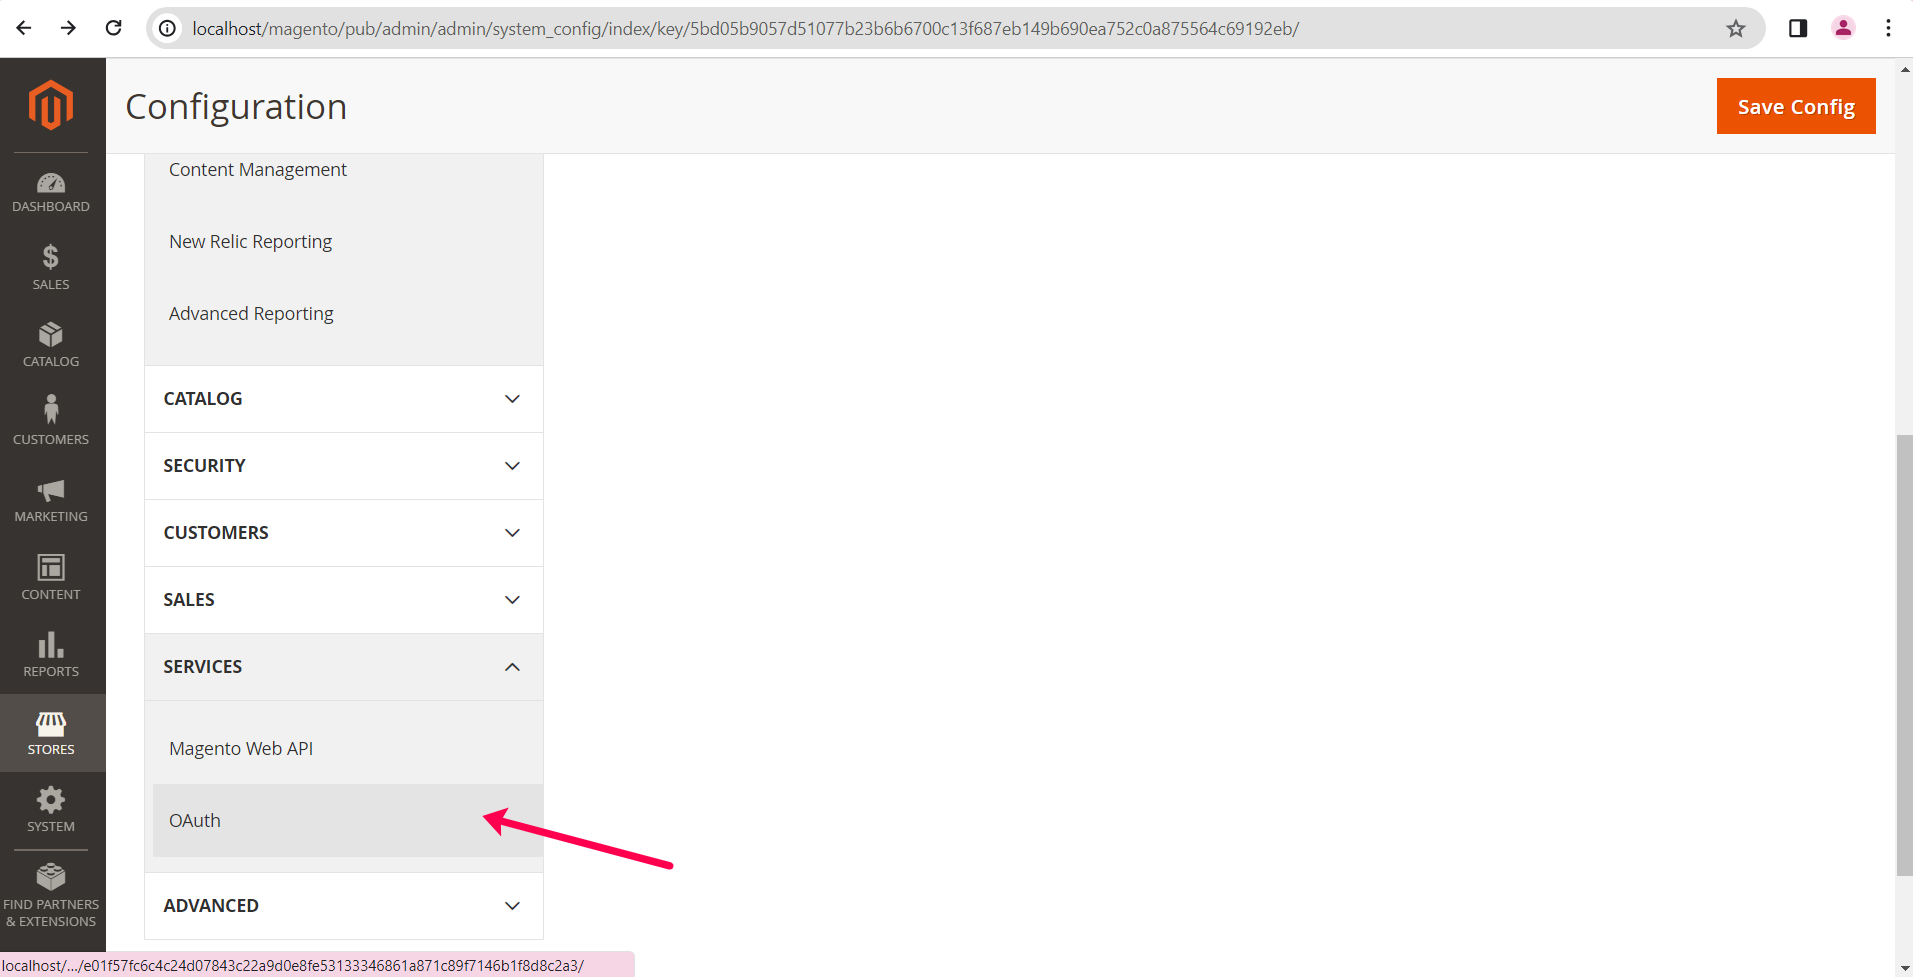
- In the configuration tab, scroll down the page until you find the SERVICES option. Click on it, and a dropdown will appear. Within this dropdown, locate and click on the OAuth option. This action will open the OAuth tab
- In the OAuth tab, locate the Consumer Settings option. You'll find several options displayed there. Among them, find the Allow OAuth Access Tokens to be used as standalone Bearer tokens setting.
- If it's set to No you need to change it to Yes. If it's already set to Yes there's no need to make any changes. You can then proceed with the rest of the help documentation.
- after set the yes click the save config your changes

Authentication:
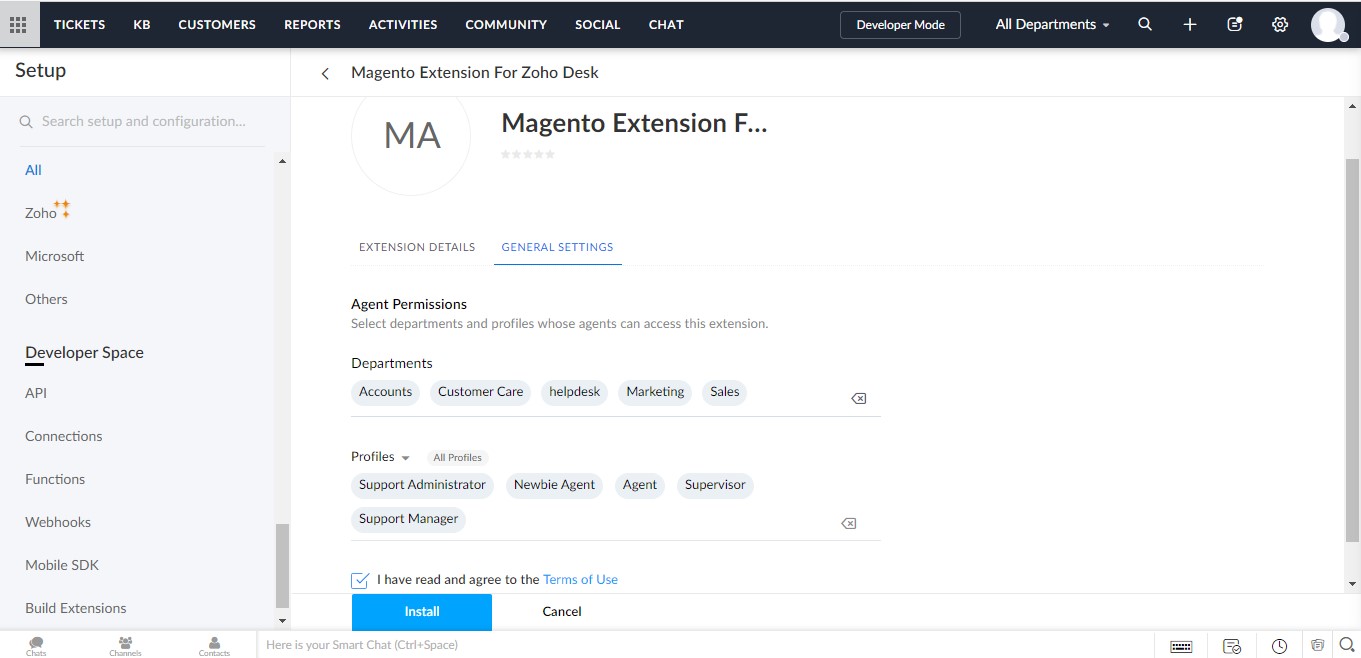
- Select departments and profile whose agents can access the extension.
- Click install button to initiate the authentication process.
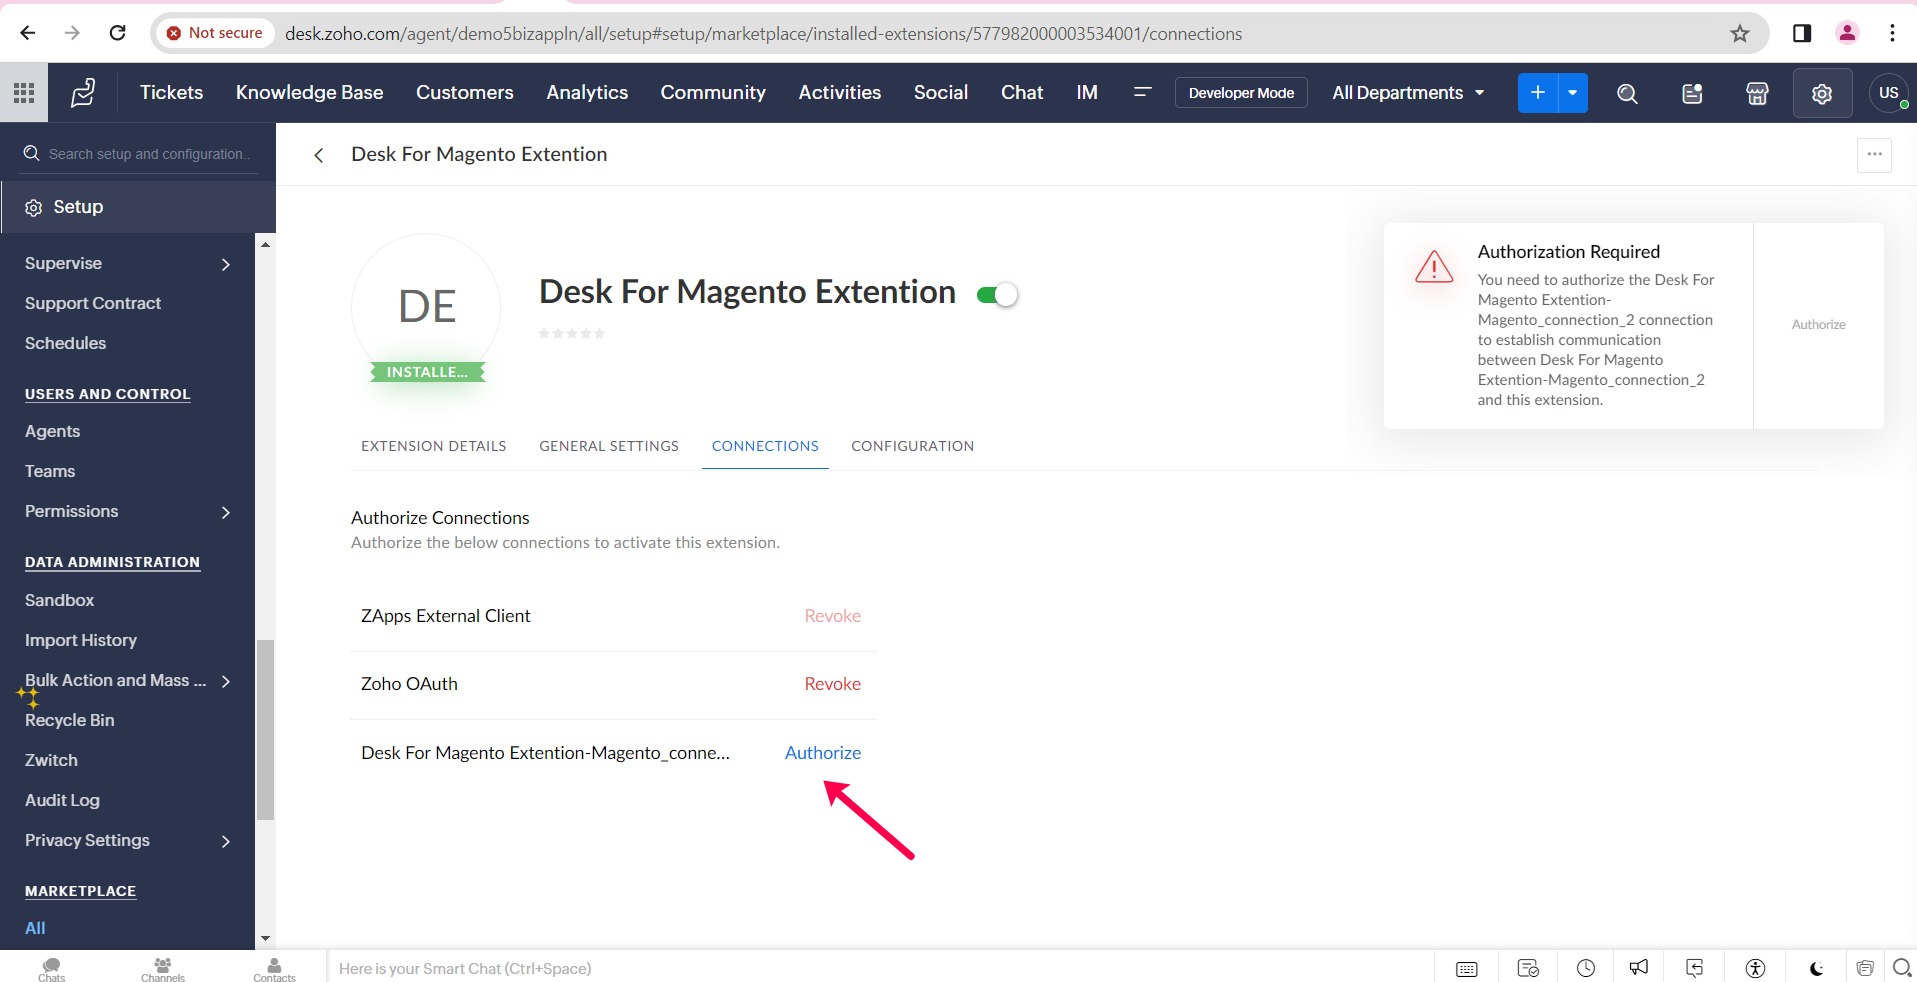
- Click on the "Connections" tab and before You authorize the Magento You need to authorize Zoho OAuth after that You Can authorize the Magento by clicking on the "Authorize" button. This will initiate the authorization process.
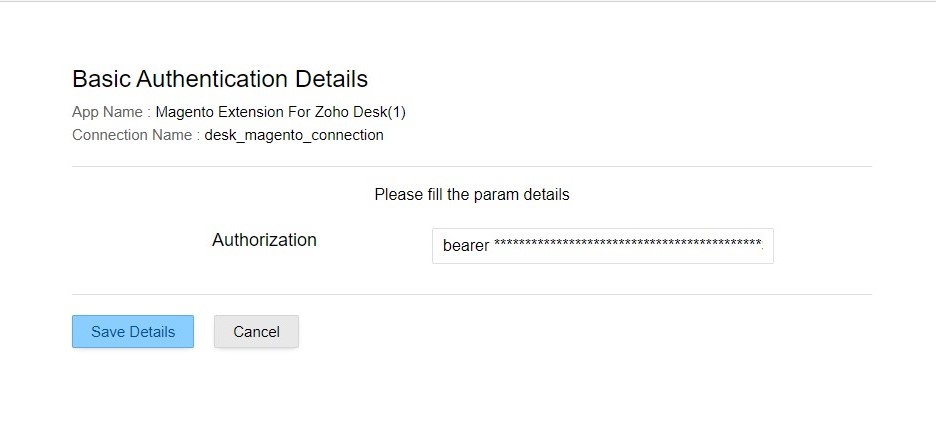
- In the Zoho Desk help document, we previously mention obtaining a Magento access token. Please follow these steps to acquire an access token from Magento and paste it into the required field in Zoho Desk Click here.
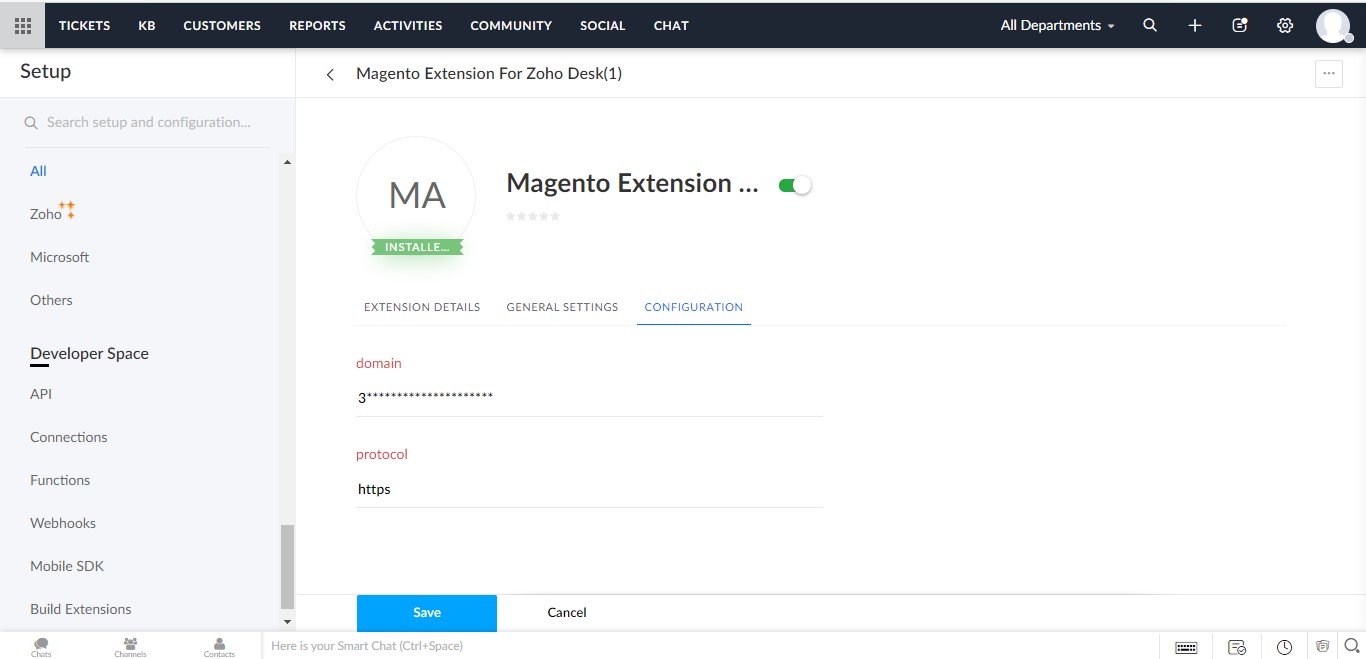
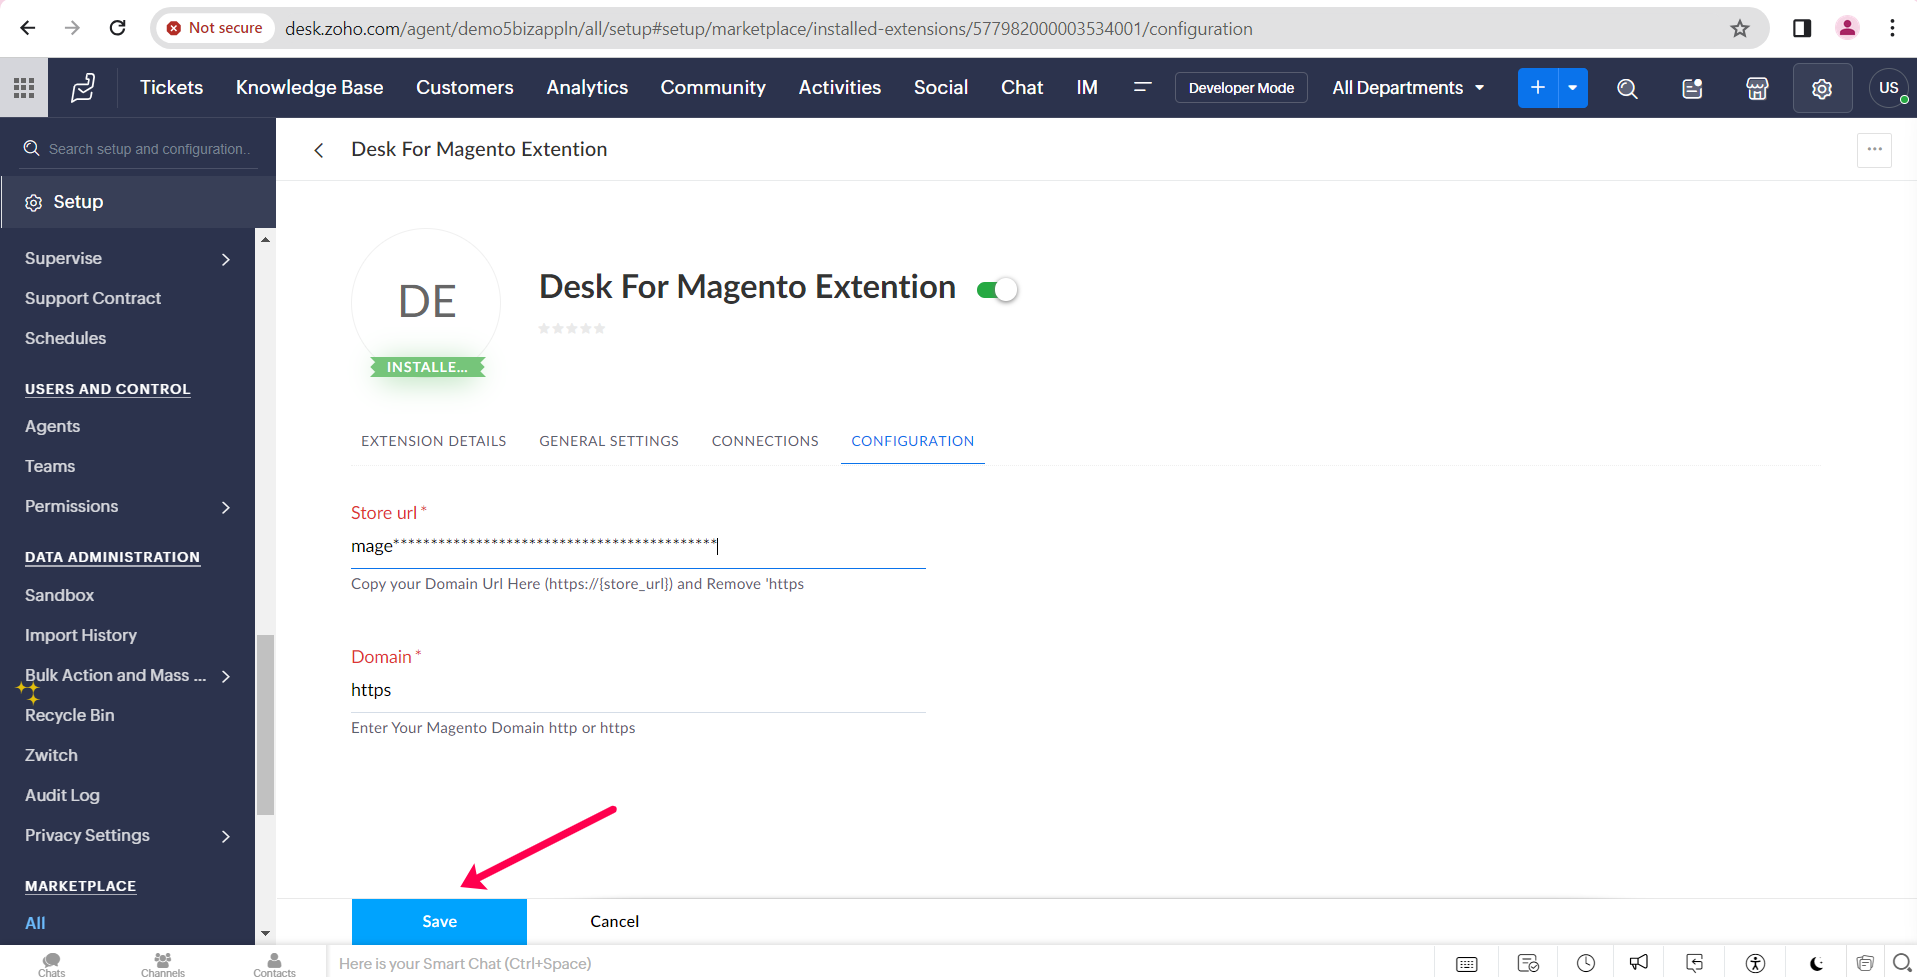
- Once you authorize a Magento Store connection, you need to provide a Magento Store URL in the Configuration tab on the Extension Settings page.
- Enter the Domain name of your Magento Store.
- Protocol will remain the same; you must mention https.
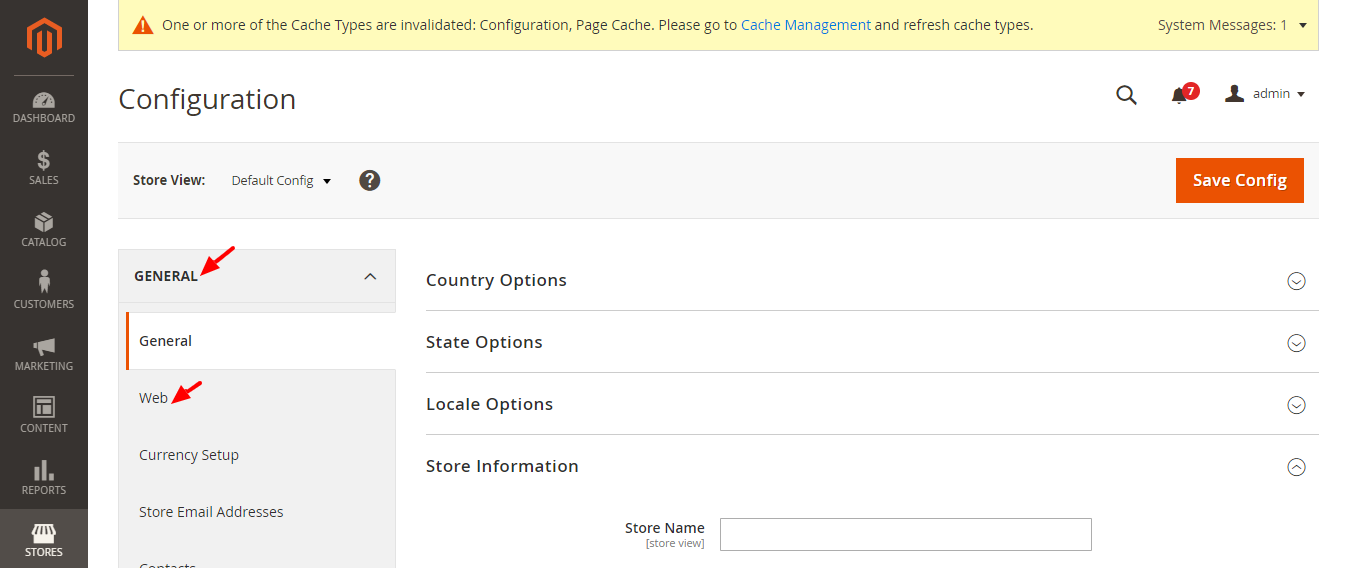
- Go to the Magento Admin Panel. Click on "STORE" in the sidebar of the Magento Admin panel.
- Click the Settings > Configuration in Side Panel.
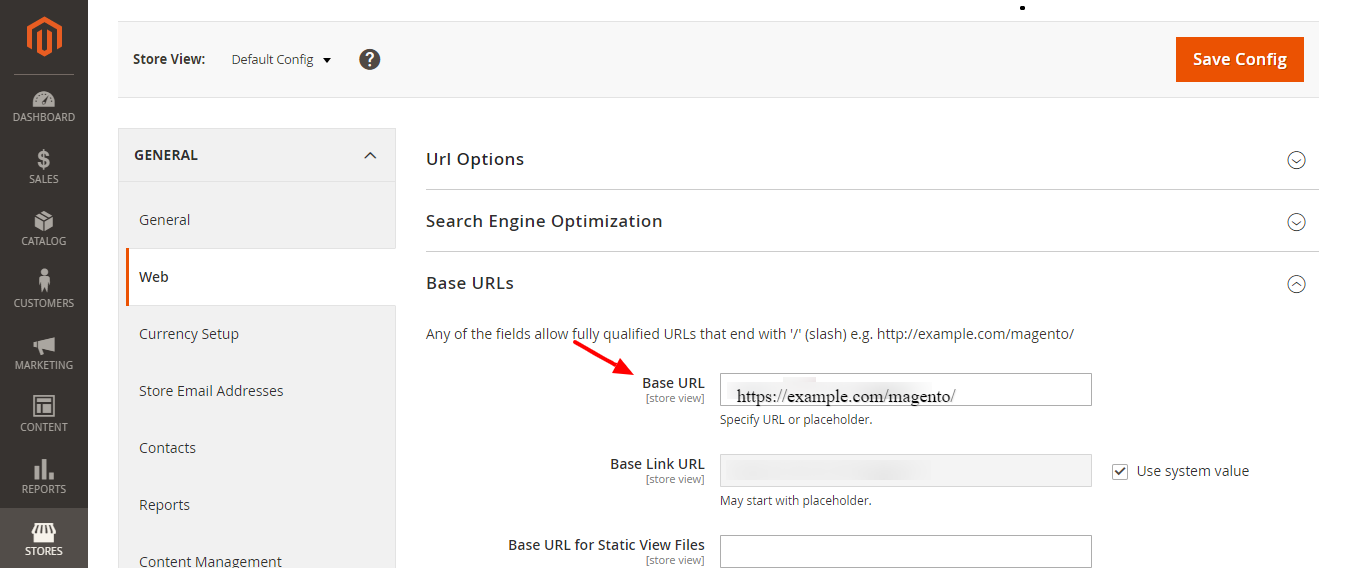
- Go to General > Web page.
- You can see your Base URL as mentioned in the screenshot. Copy and use it for the DomainName and protocol.
- It's Mandatory to enter your store domain's protocol(ex: https).
- After filling the details,click the save button to connect your store with Zoho Desk.

Note : Before you paste a access token need to add a bearer.
Example : bearer<"Space"><"Your Access Token">
Example 1: In Store Url :https://example.com/magento/ Domain Name : example.com/magento Example 2 :In Store Url :https://sample.com/ Domain Name : sample.com
To get the store URl,follow these steps:
Enable Magento Integration via eWidget
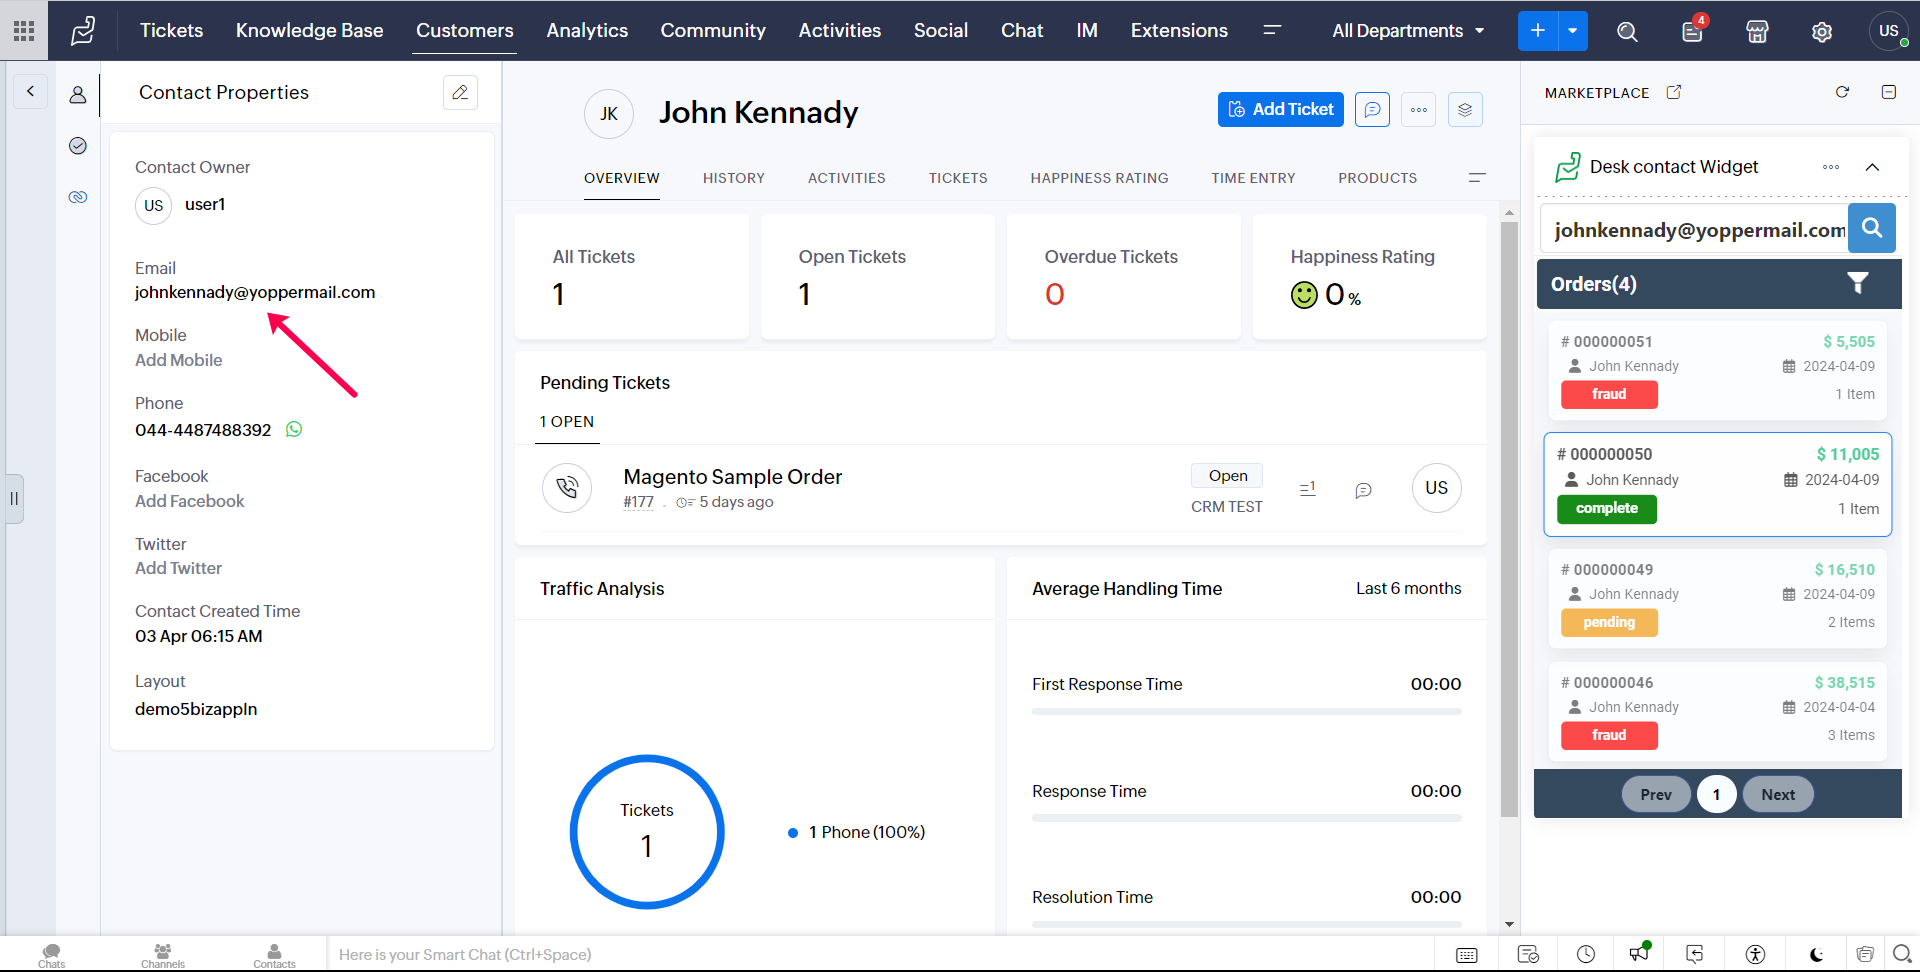
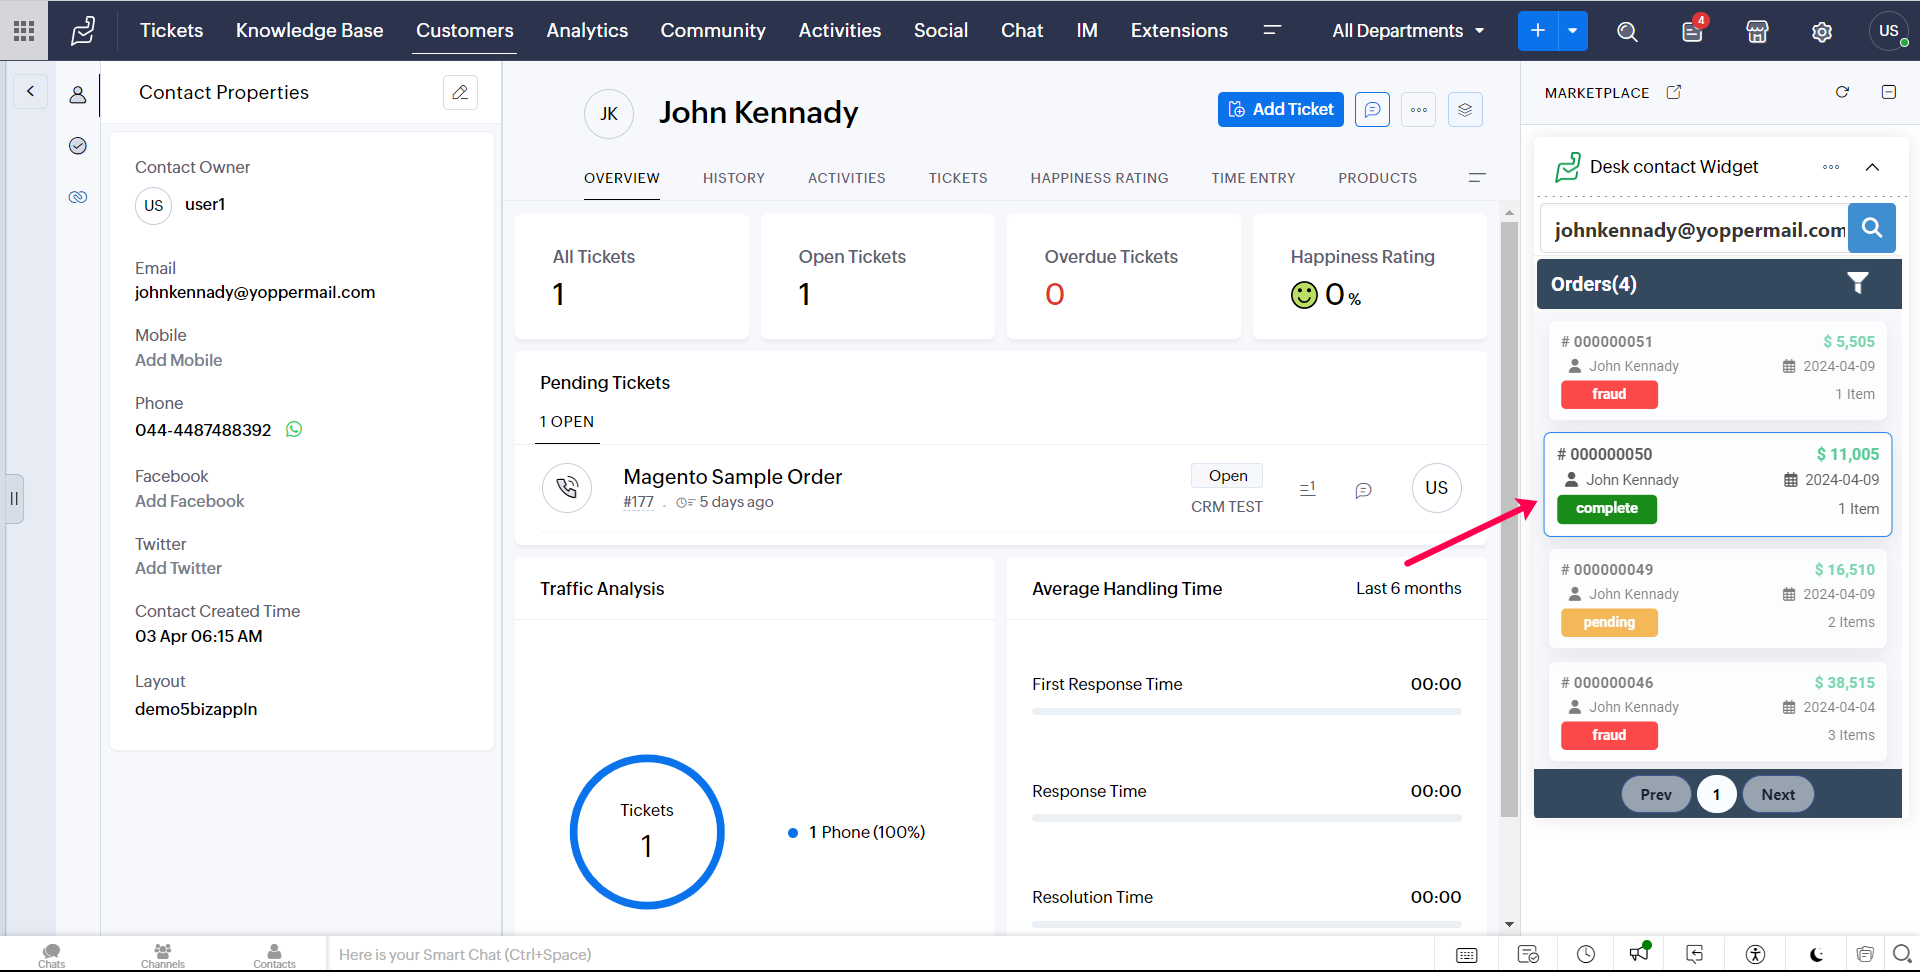
- Once the authorization process is completed successfully, you can view the Magento order details in the Tickets and Customers modules in the Zoho Desk. The order details include the customer's name, order date, order number, total amount, and order status. You can also view the customer's contact information, including notes and attachments.
- Tickets or Customer records can be accessed according to your preferences. Tickets have an email address, which needs to be the same on Magento.
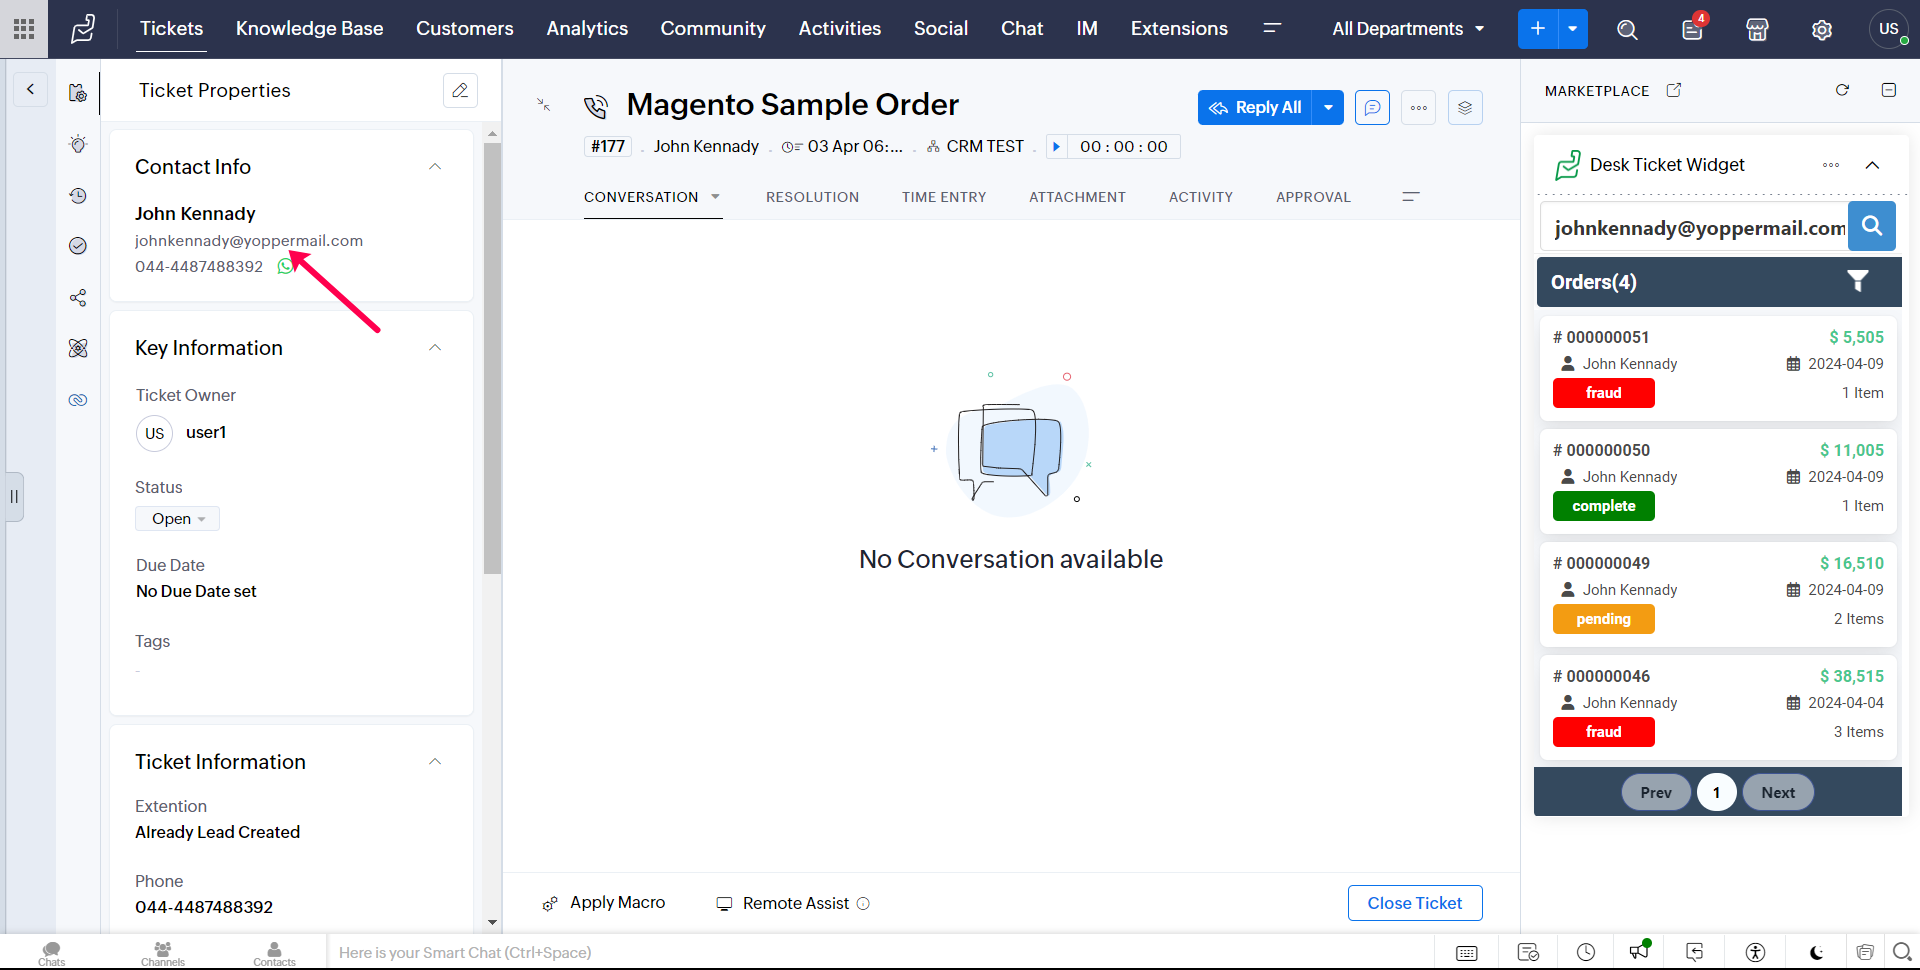
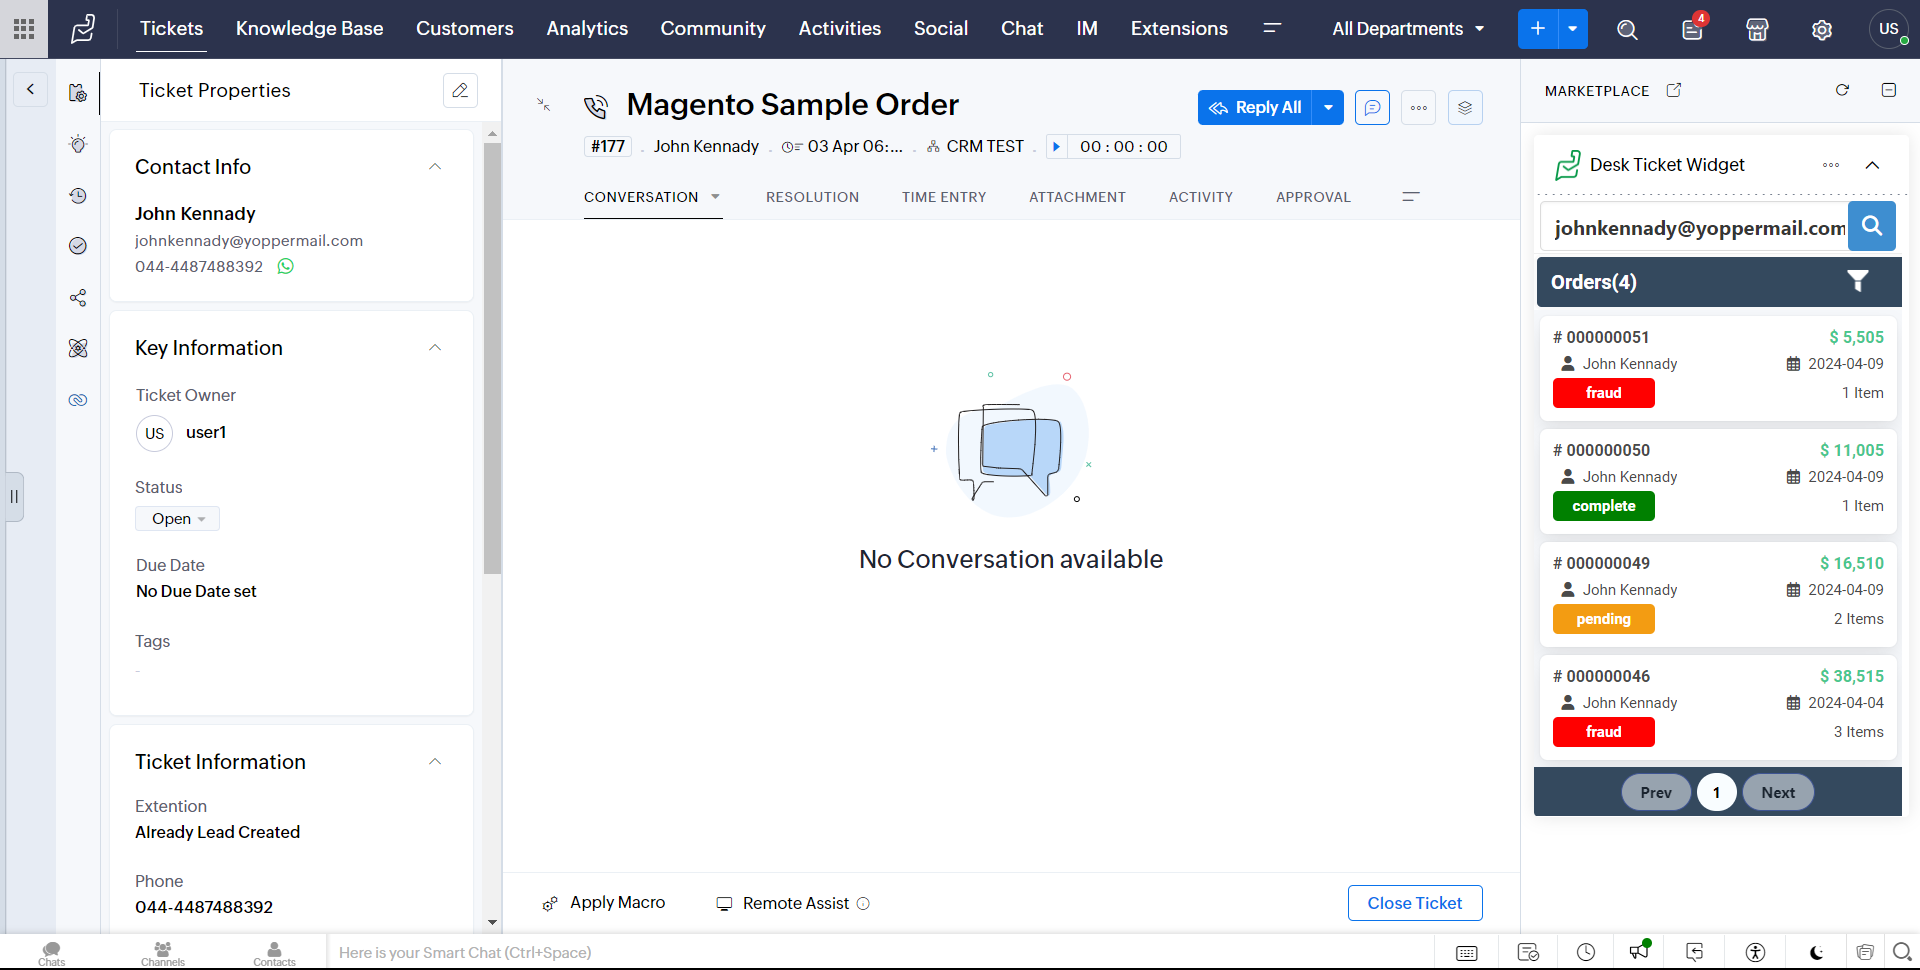
- To view order details from the Magento store within Zoho Desk's Tickets or Customers record, click on the Zoho desk eWidget icon on the right pane and select Desk Ticket Widget from the app menu.
- Our extension shows all Magento orders associated with the customer within the Zoho Desk Ticket. The order details can also be found within the corresponding Customer record.
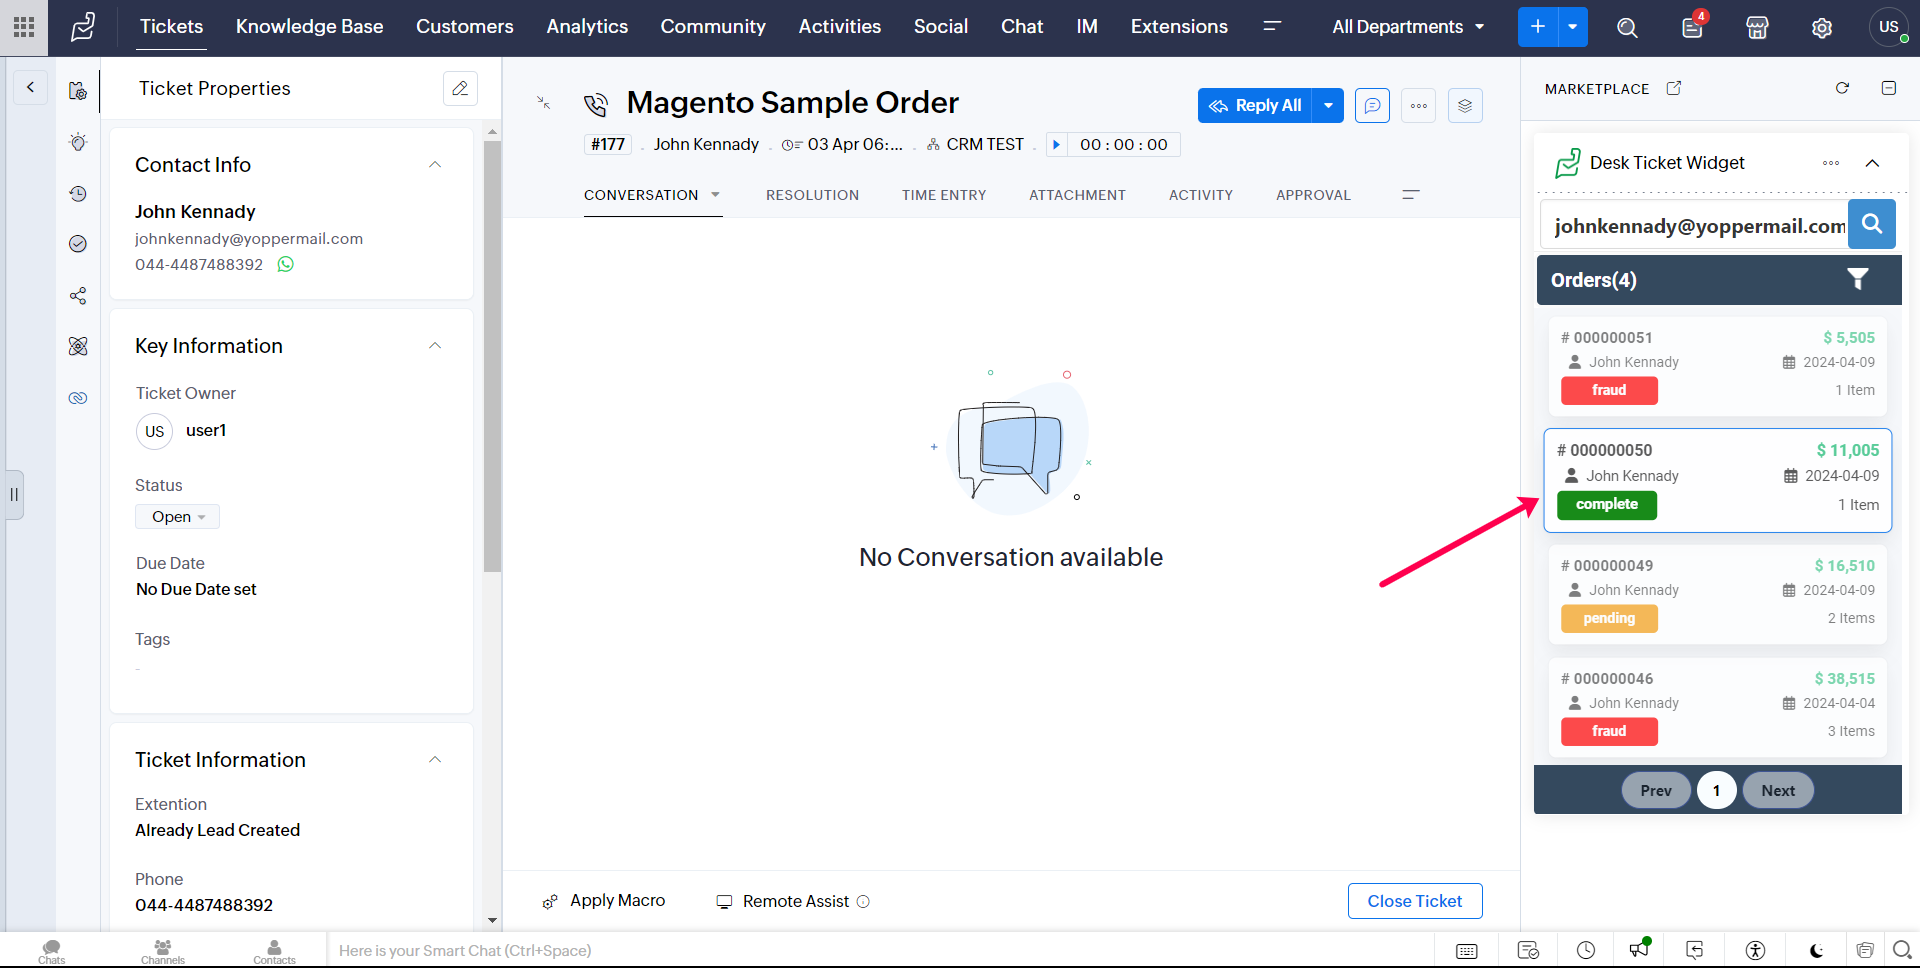
- To view the order details in detail, simply click on the corresponding order to view the entire order details.
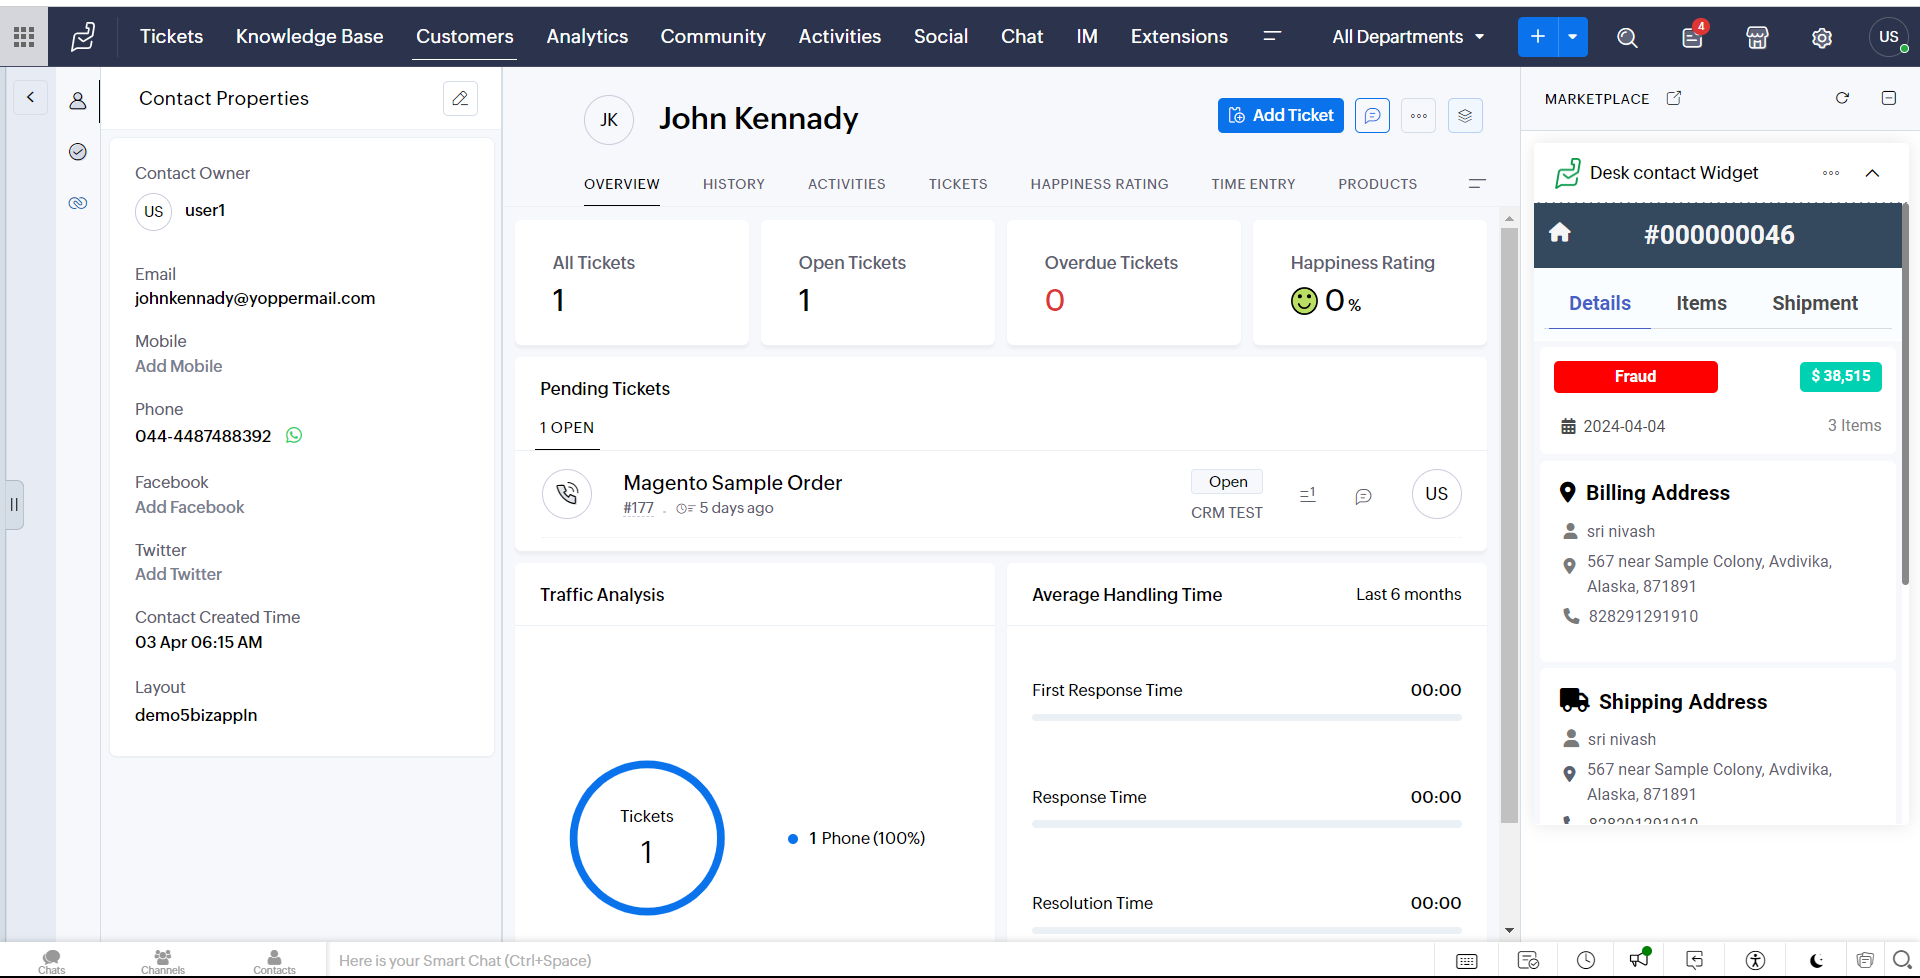
- On the Orders Details page within eWidget, you can take a glance at the order details.
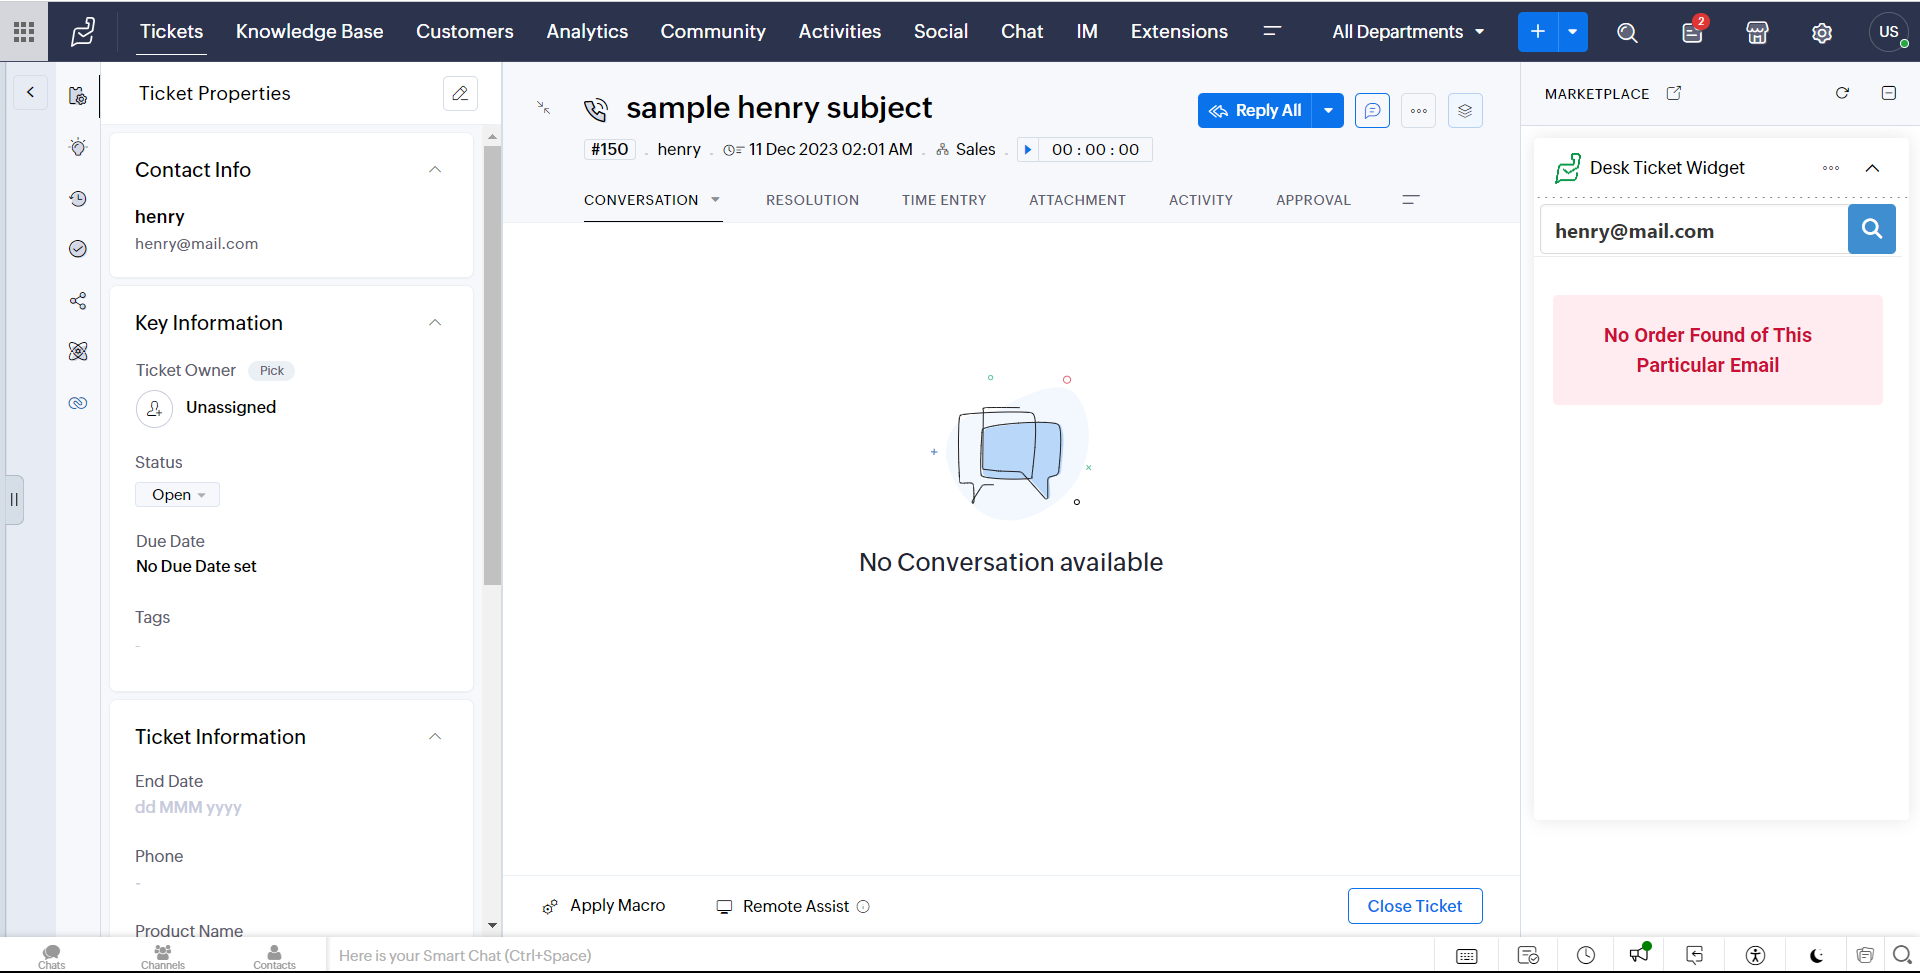
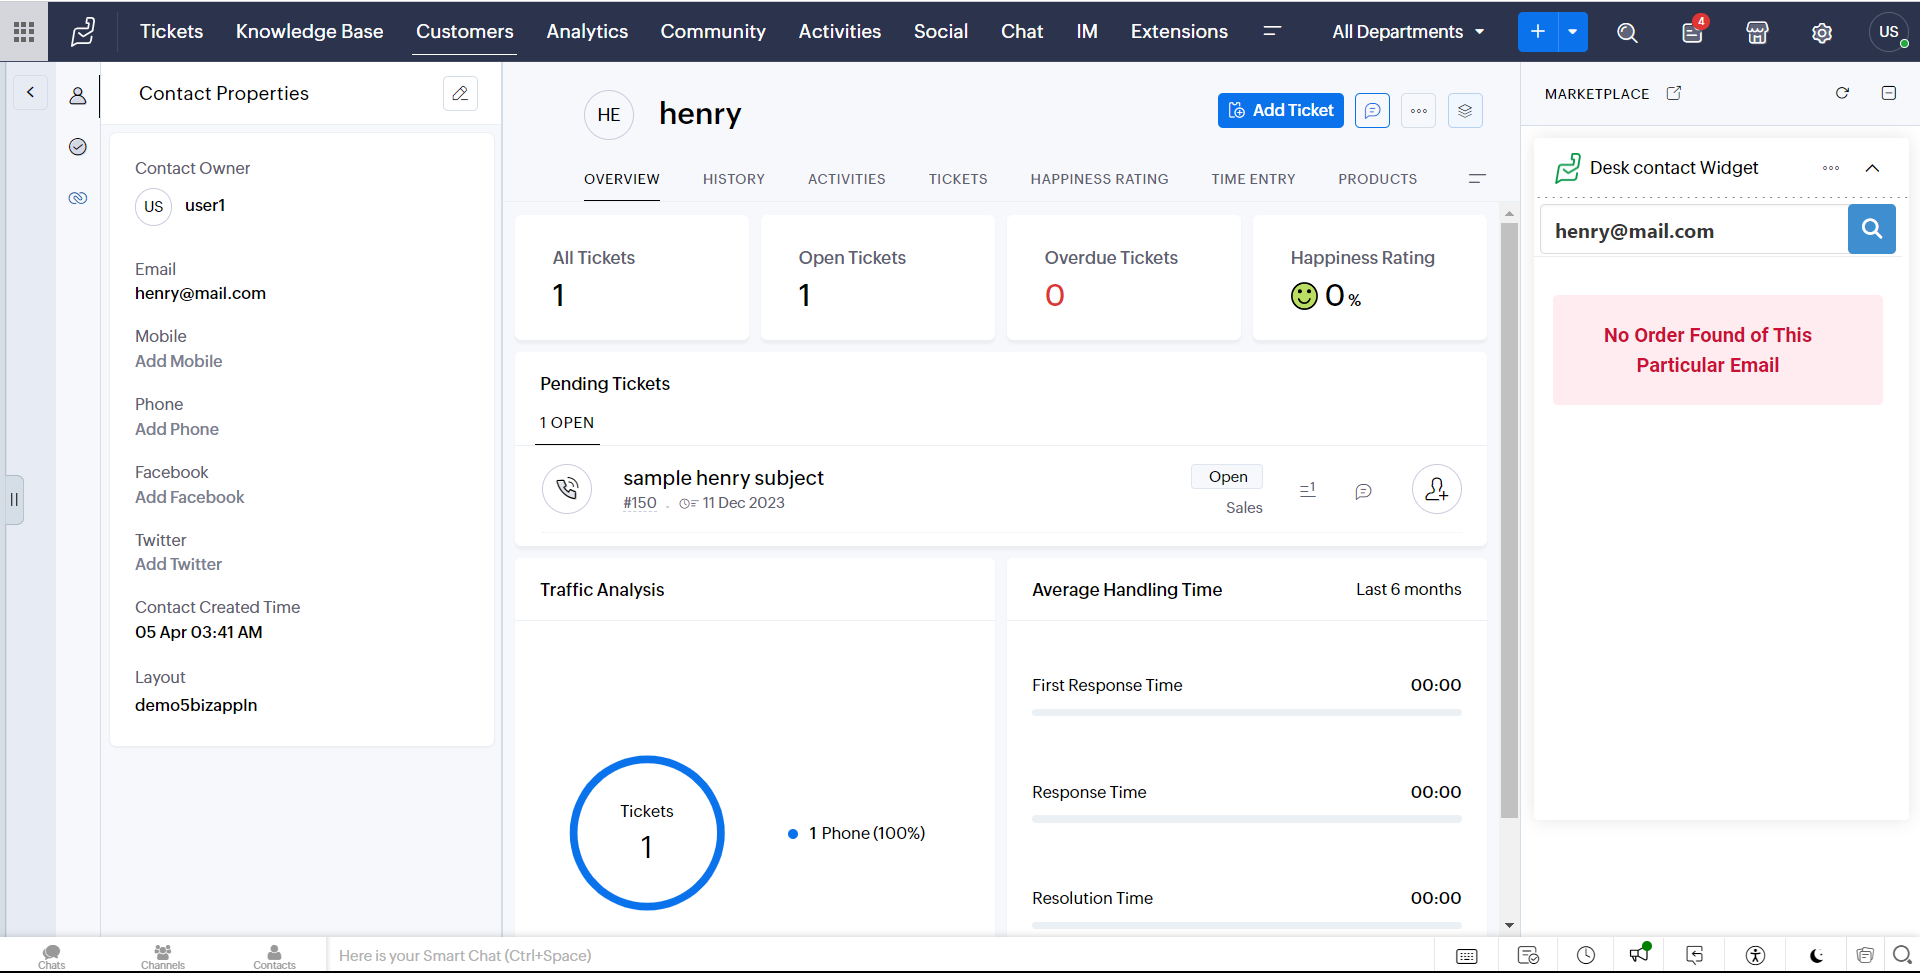
- If the Ticket Email Not Same as magento Mail,It display "No Order Fount of this particular Mail".
Note : The order details are retrieved based on email IDs from Magento. Therefore, before checking the order details in the Tickets/Customers modules, you need to ensure that the order's email ID-based customers and Tickets are created in Zoho Desk. If they do not exist, you have to create them manually.
In Ticket Module
In Contact Module
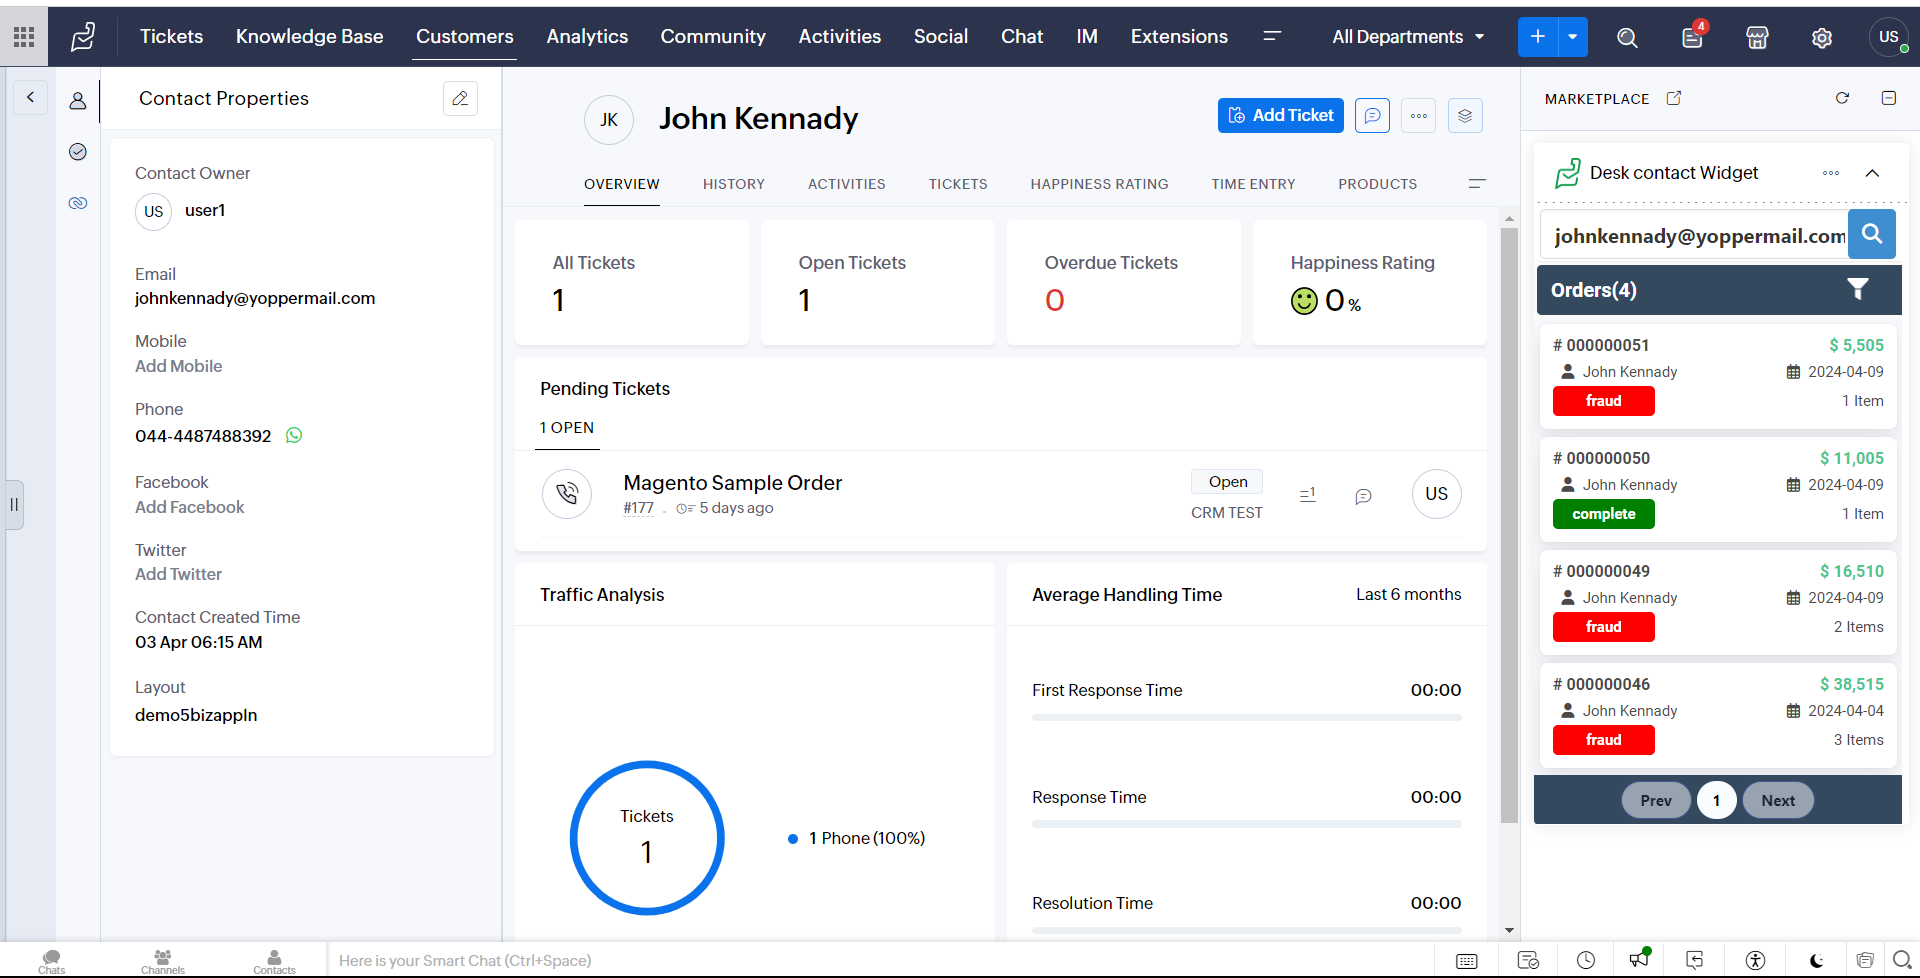
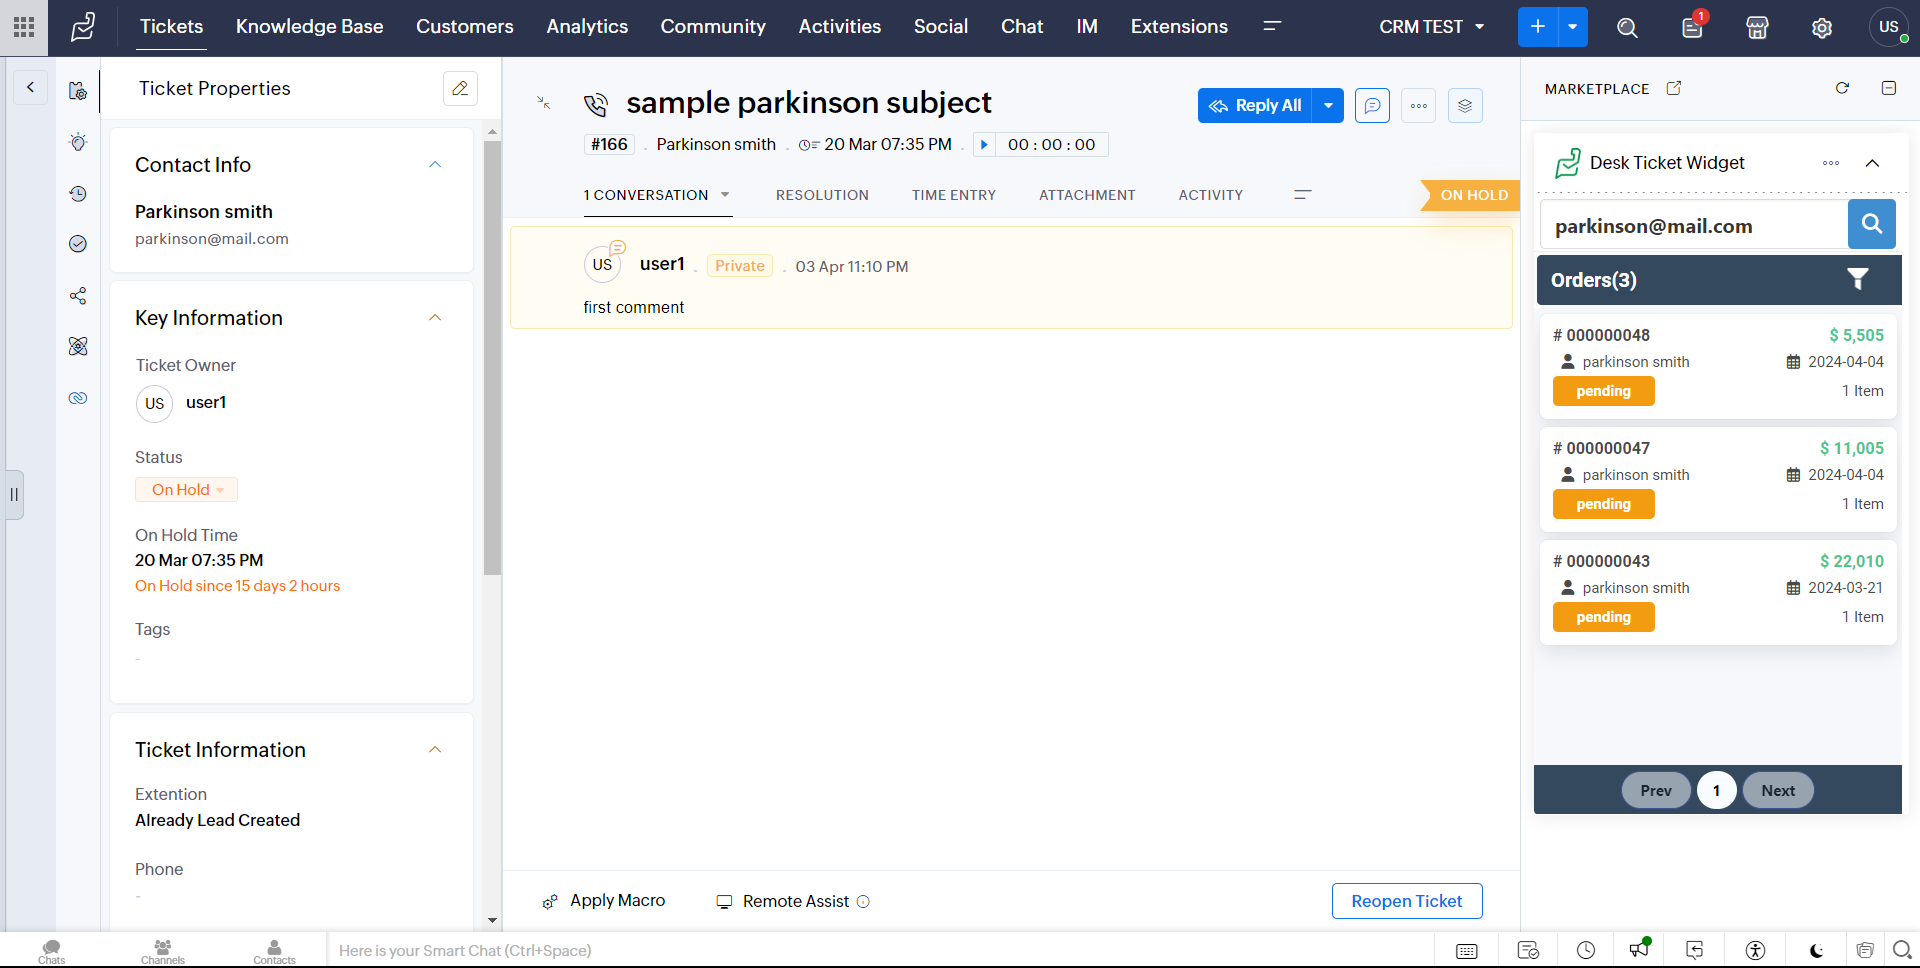
Note: WE have added a feature - Global Email search. With this feature, you can search for Magento order details within Zoho Desk based on the customer's email address in Magento. With the Global Email Search, you can also find order details for any Customer's email address in Magento, which is not available in Zoho Desk.
In Ticket Module
In Customer Module
In Ticket Module
In Customer Module
In Ticket Module

In Customer Module
In Ticket Module
In Customer Module
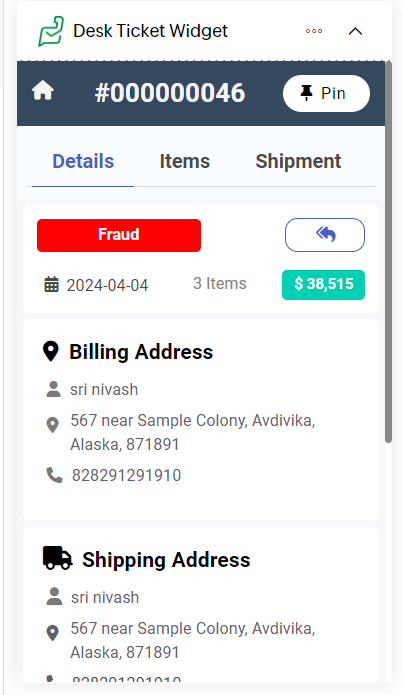
Orders Tab:
1.You can view the customers’ Magento orders detail along with date, status, comments, payment details, billing and shipping address within corresponding ticket record in Zoho Desk.The same information is also available in Zoho Desk's Customer record.
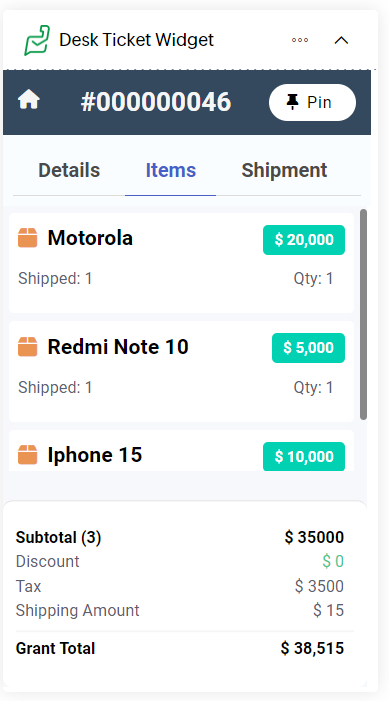
Items Tab:
1.You can view the order item details including product ordered, quantity orders, total price of each item, number of items shipped, Grand Total, Subtotal, Tax, and discount within the corresponding ticket record in Zoho Desk. The same information is also available in Zoho Desk's Customer record.
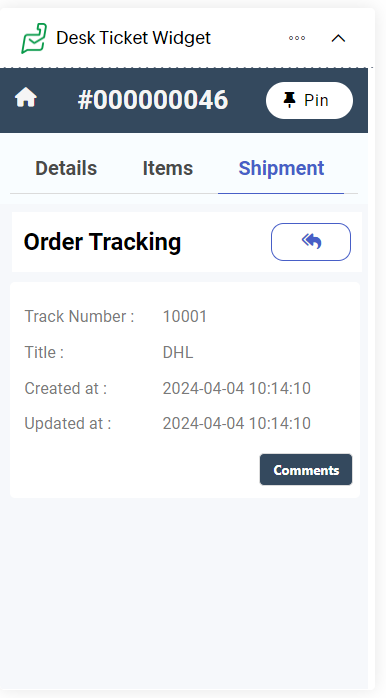
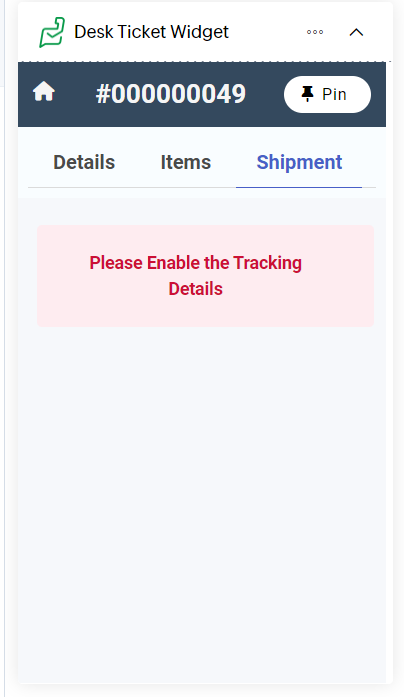
Shipments Tab:
1. You can view the shipment details along with the tracking number, carrier, and shipment comments within the corresponding ticket record in Zoho Desk. The same information is also available in Zoho Desk's Customer record.
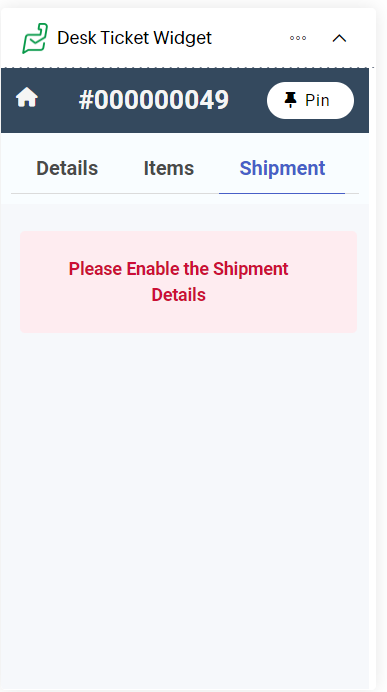
No Shipping Details
Note: If there is no shipment information available for the order in Magento, there will be no information available here.
No Tracking Details
Note: If You Didn't add Tracking Details of that Shipment there will be no tracking information available in our extension.
Features of this Extension
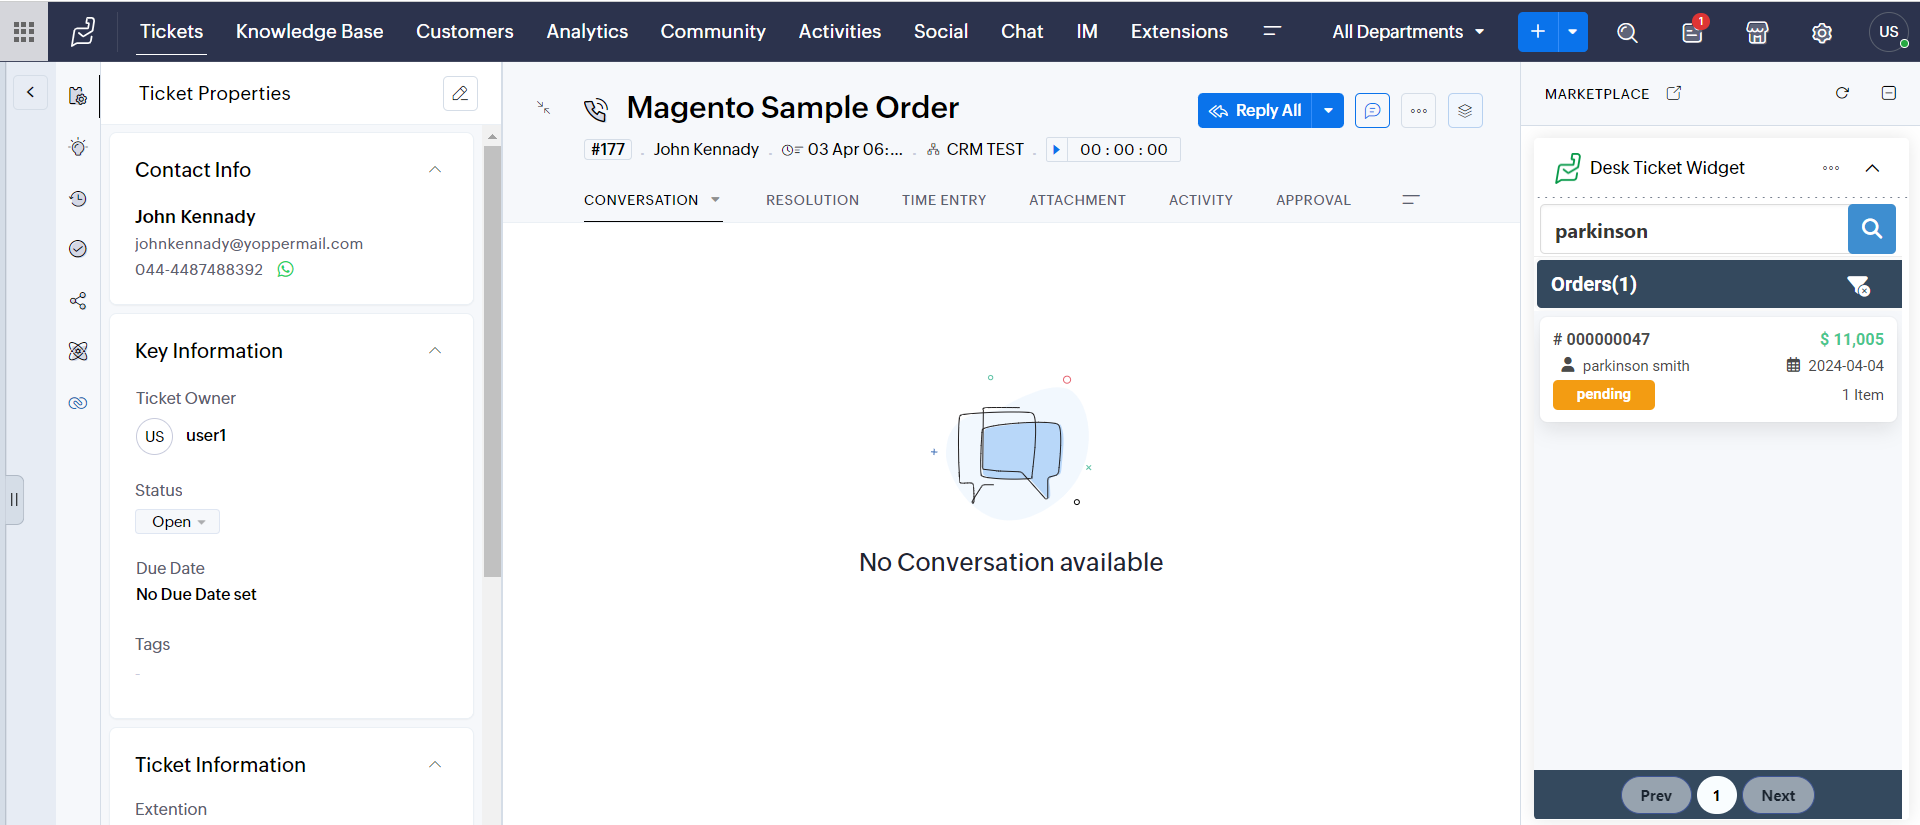
Search:
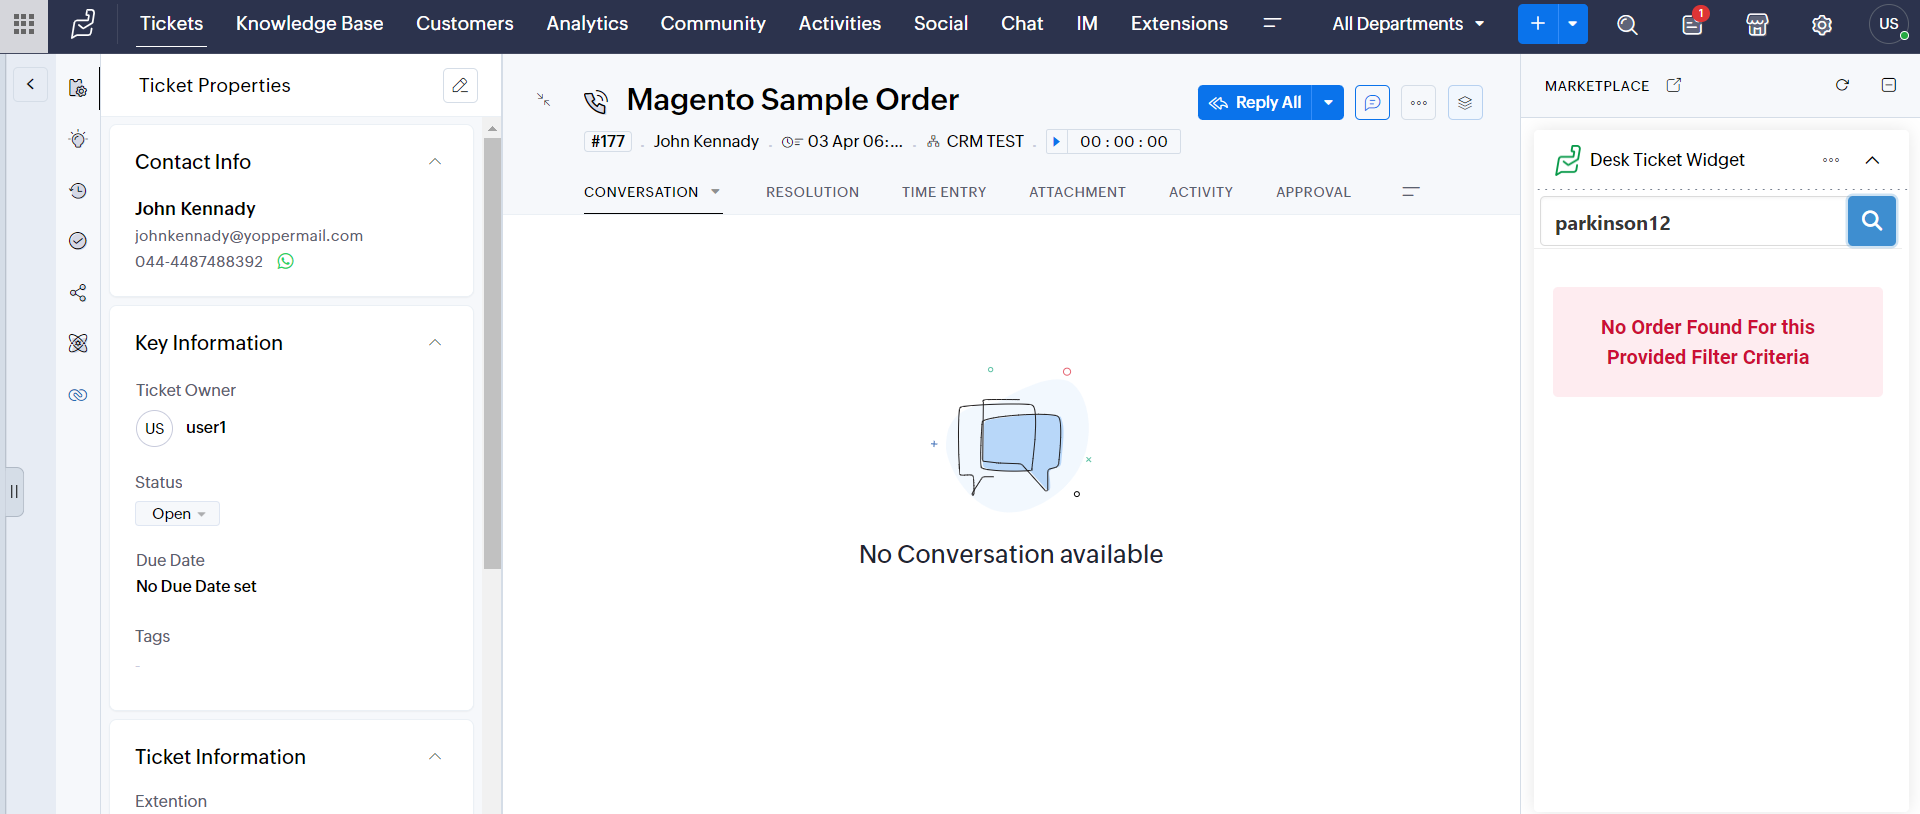
1. You can search for orders globally using Email, Customer First Name, Customer Last Name and Order ID and then it will list the order based on your search.

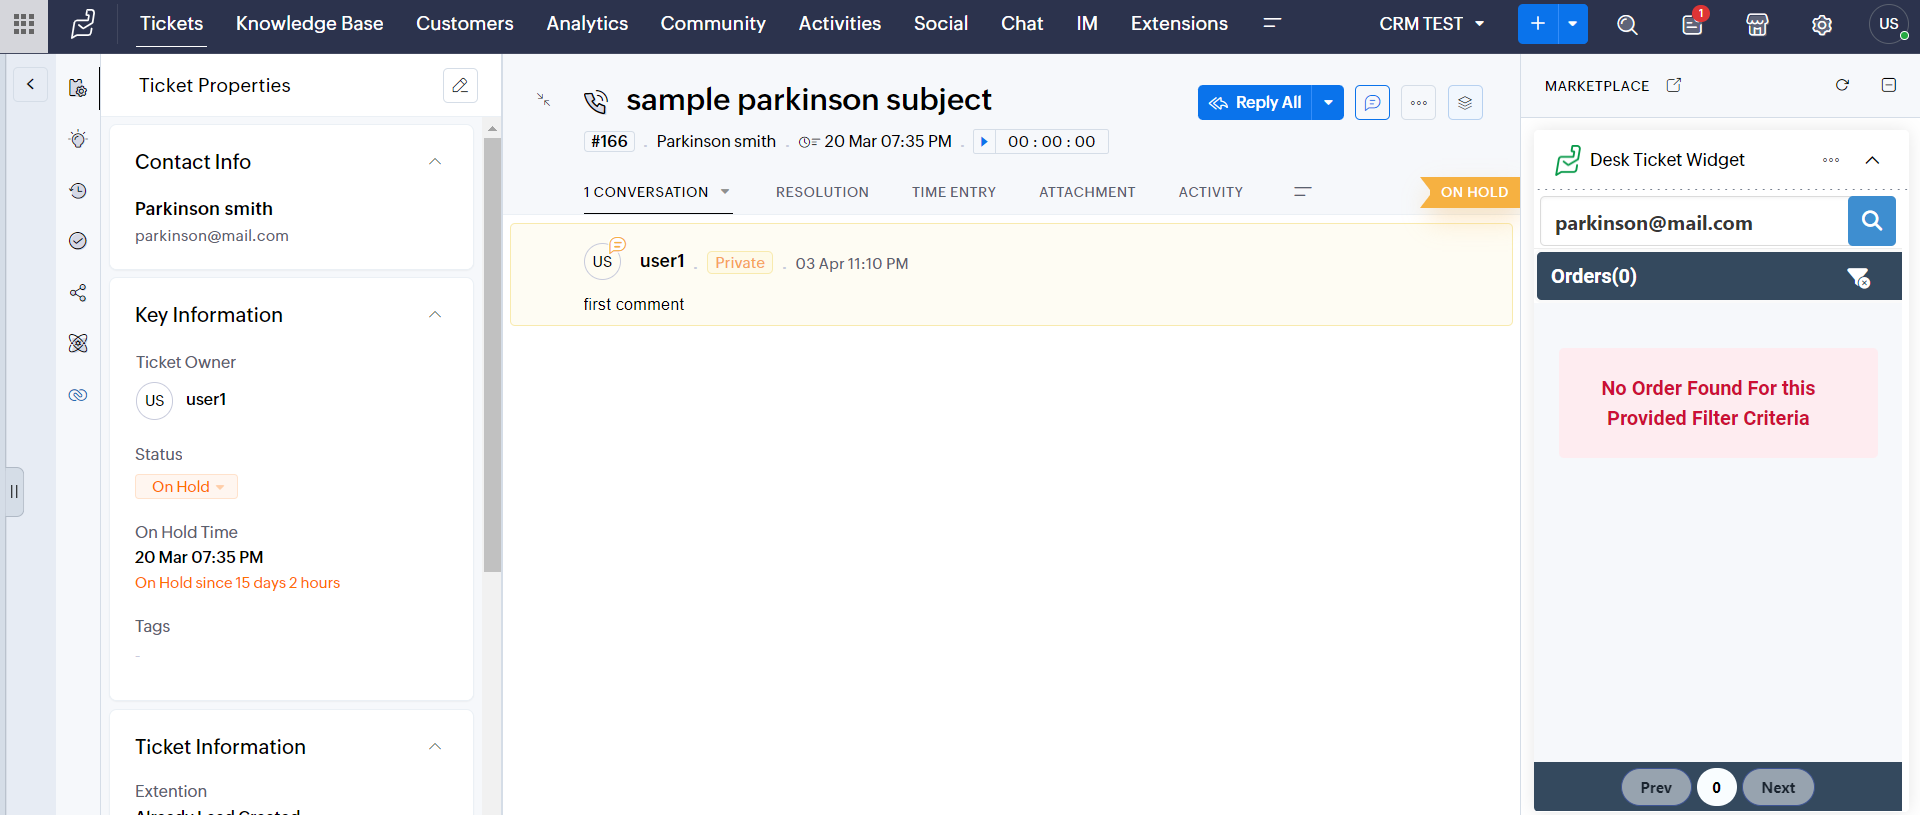
Note: If you enter wrong details in Search Box,it displays this No Order Found For this Provided Filter Criteria.
Filter:
1. we can Apply the Filter Based on Displayed Order List,we will use to apply filter based on Order id, Date and Status.
2. You Can Filter Out the Order by Clicking the Filter Icon.
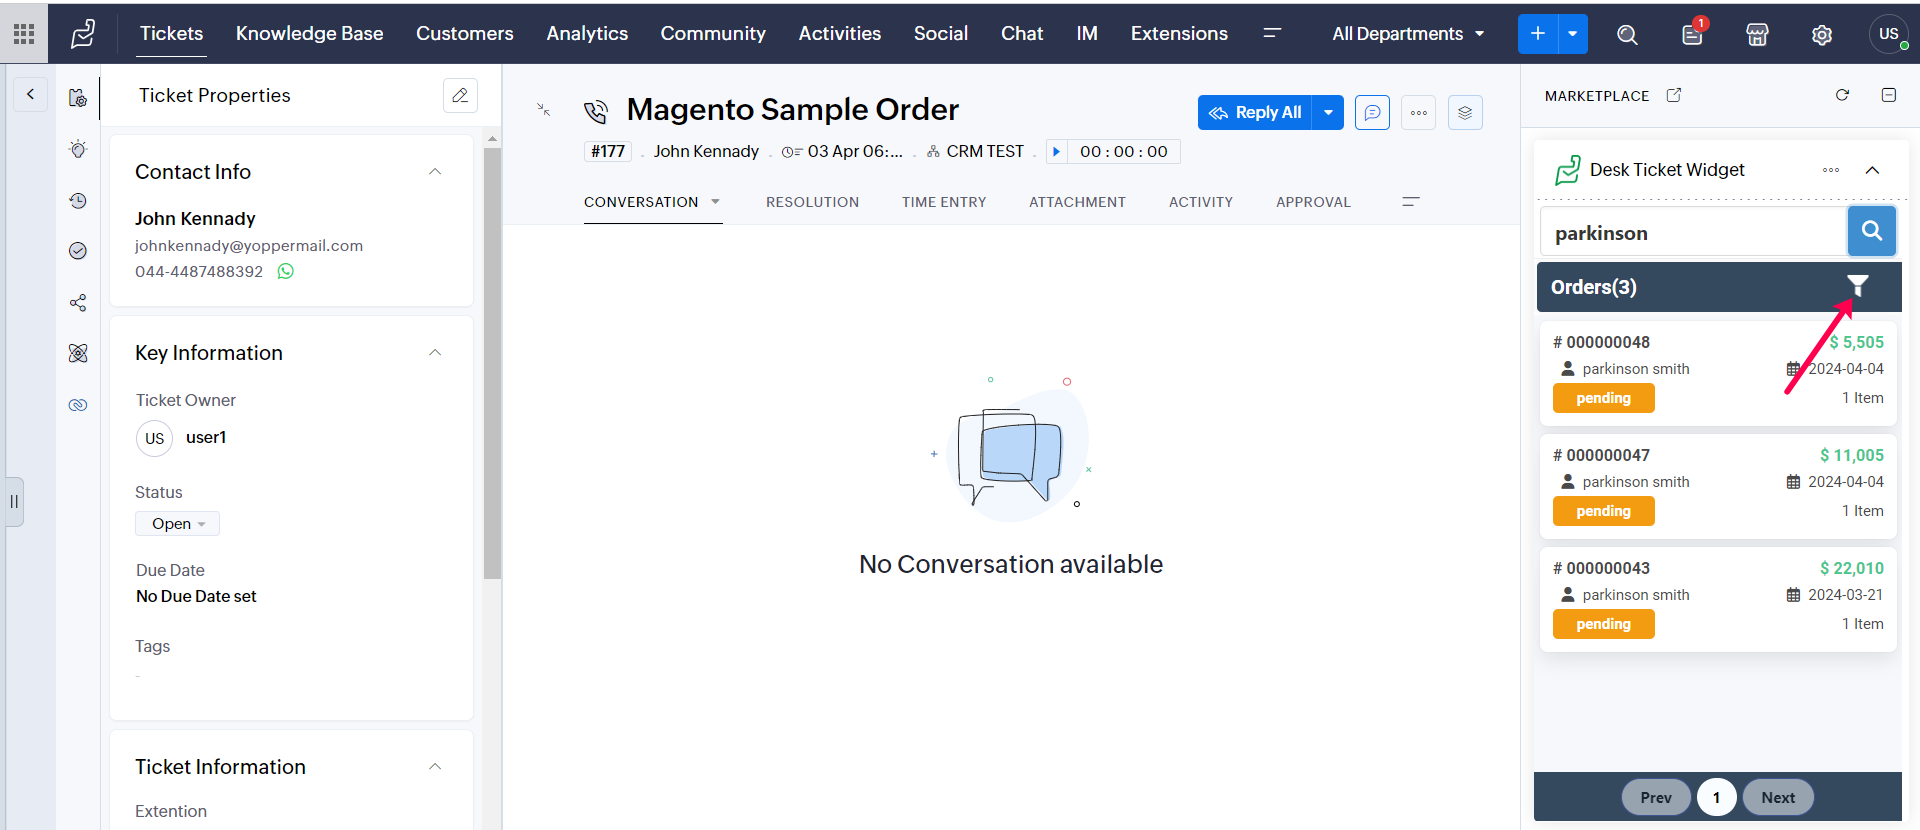
3. if you will click the Filter Icon,It will Open the Modal then Enter the OrderID Or Status and Date Then Click Filter Button.
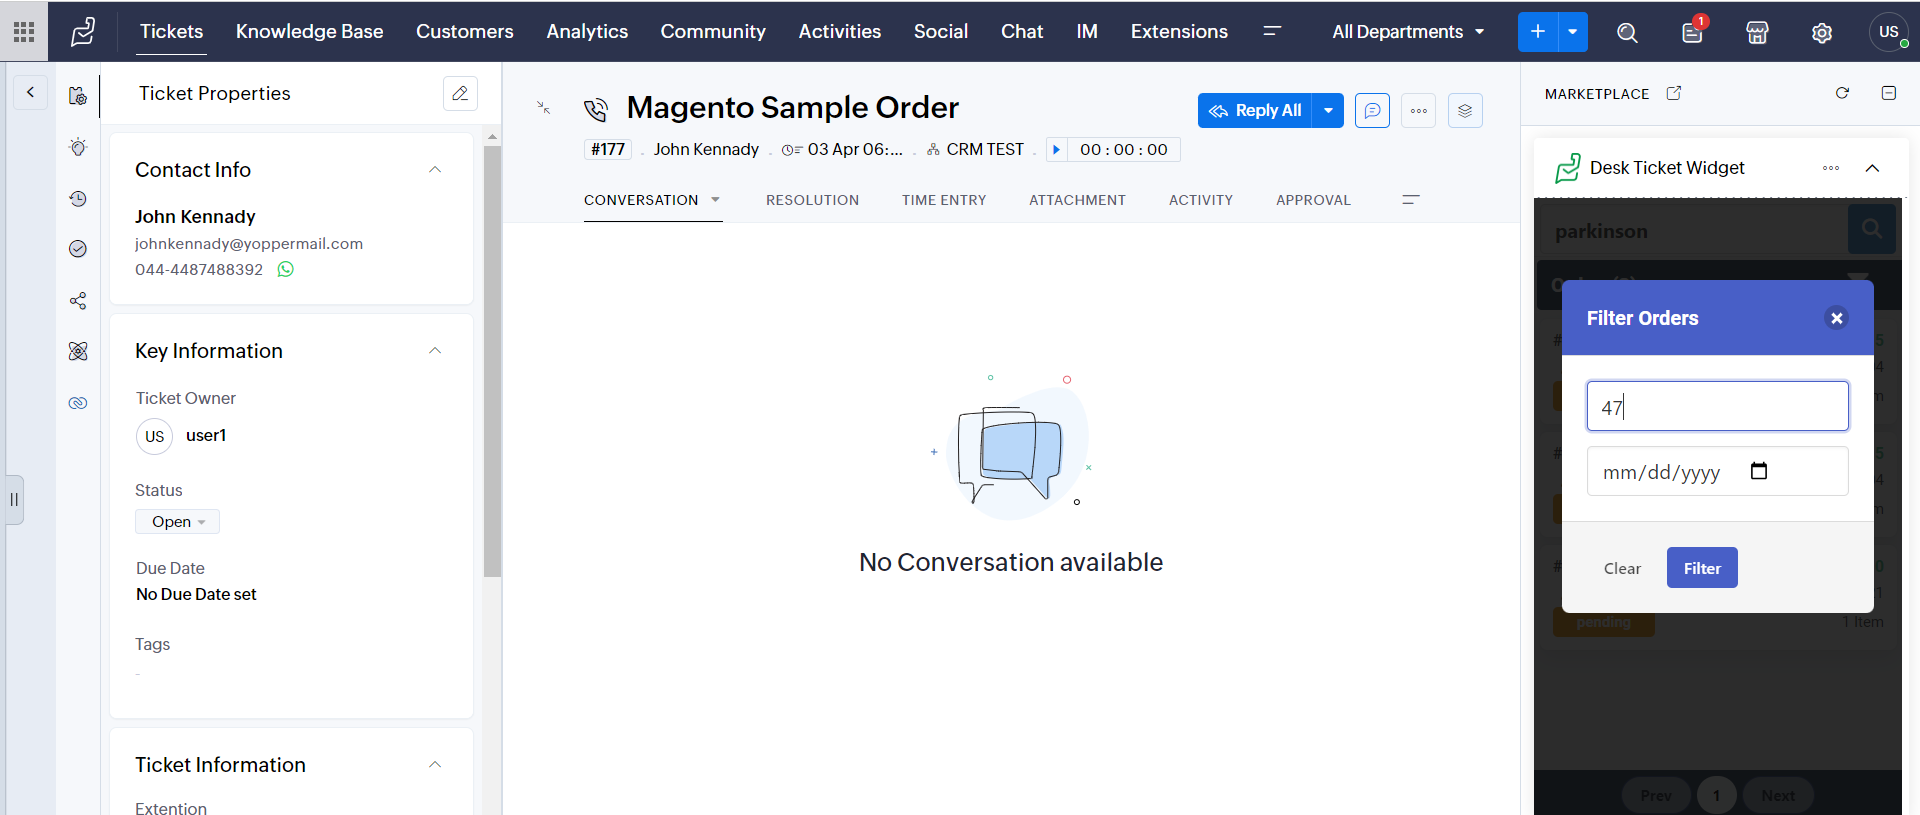
4. Once You Click Filter Button,It will Display the Filtered Orders.
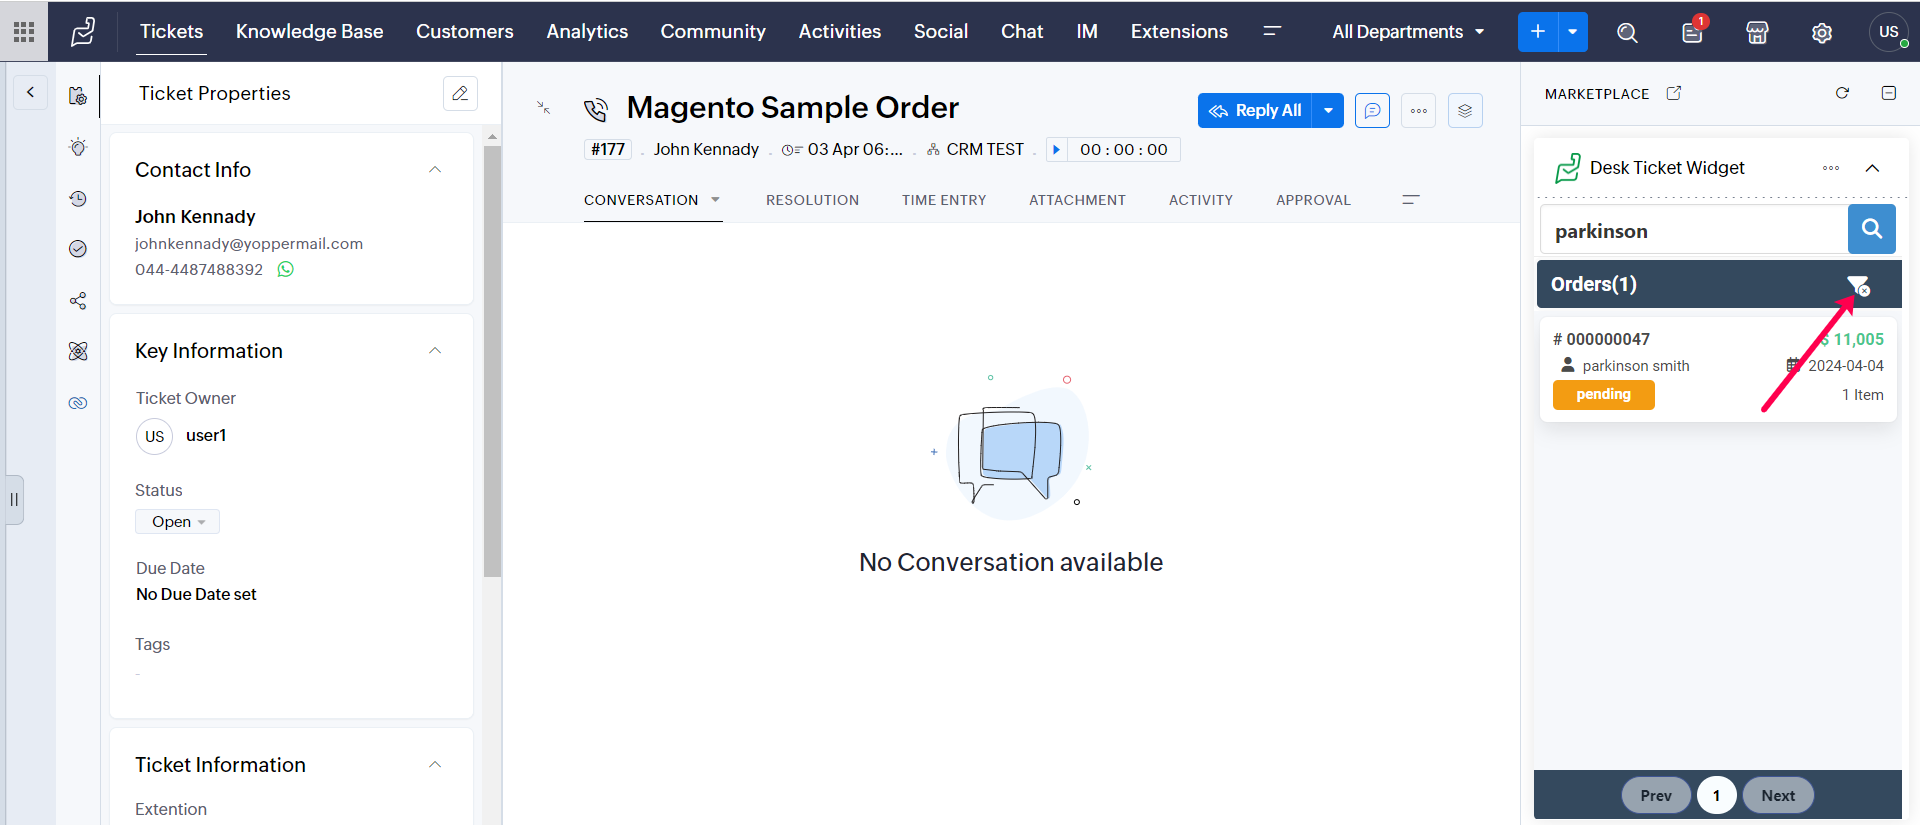
5. You Can Remove Filtered Orders by Clicking the Clear Filter Icon.
Note: If you enter wrong details in the filter box,it displays "No Order Found For this Provided Filter Criteria".
Pin The Order:
1. A specific order can be pinned by clicking the Pin button.
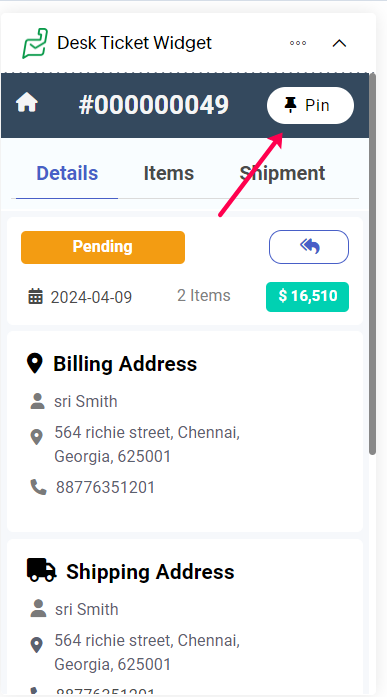
2. When you view the ticket in the widget again it will show that the order has been pinned.
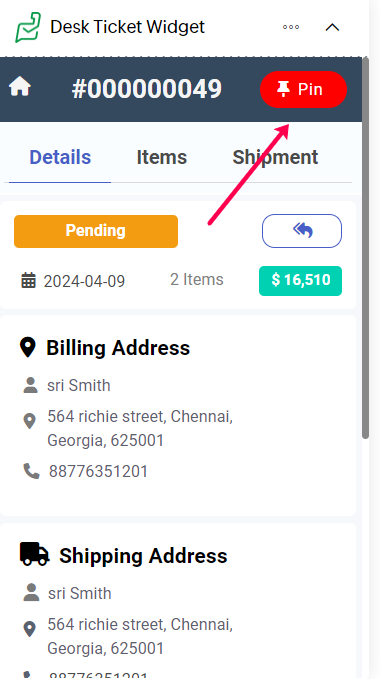
Note : You can pin only one order per customer based ticket and You cannot use this map function in the Customer module.
Reply Mail
1. You can share order details via email by clicking the Reply button.
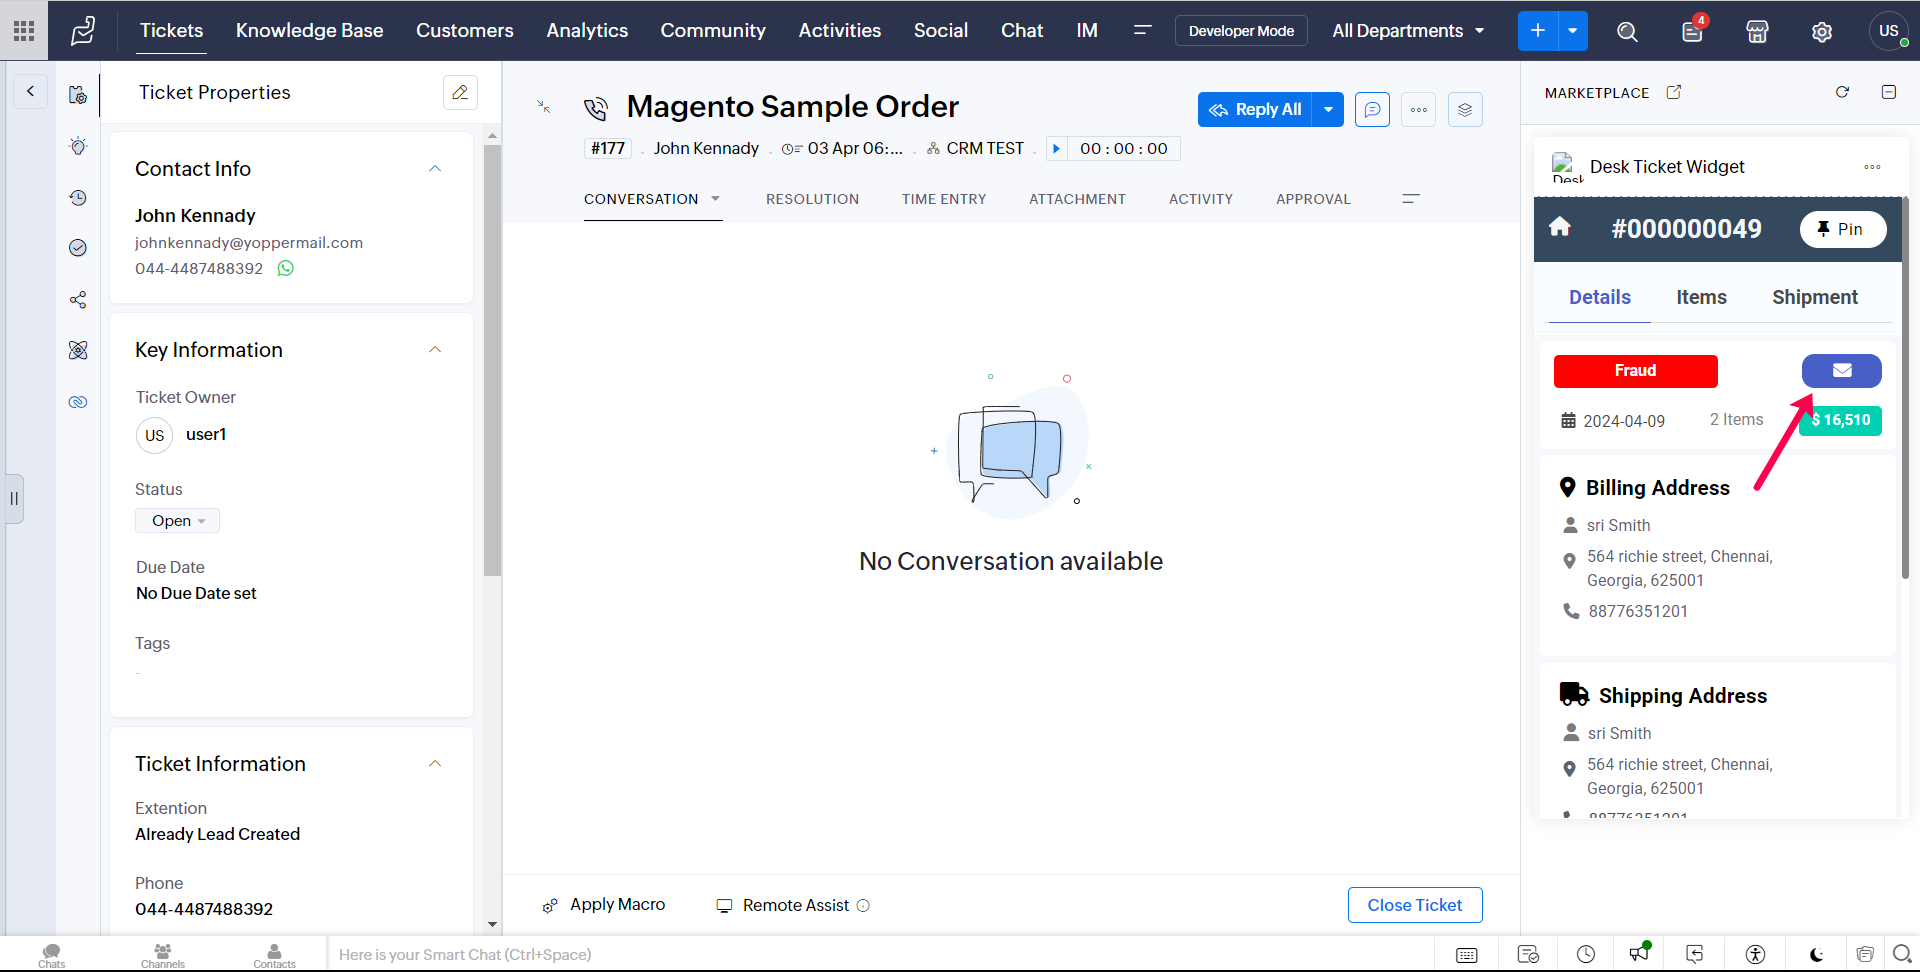
2. Once You Click Reply Button, It Will add Orders Details on the Mail.
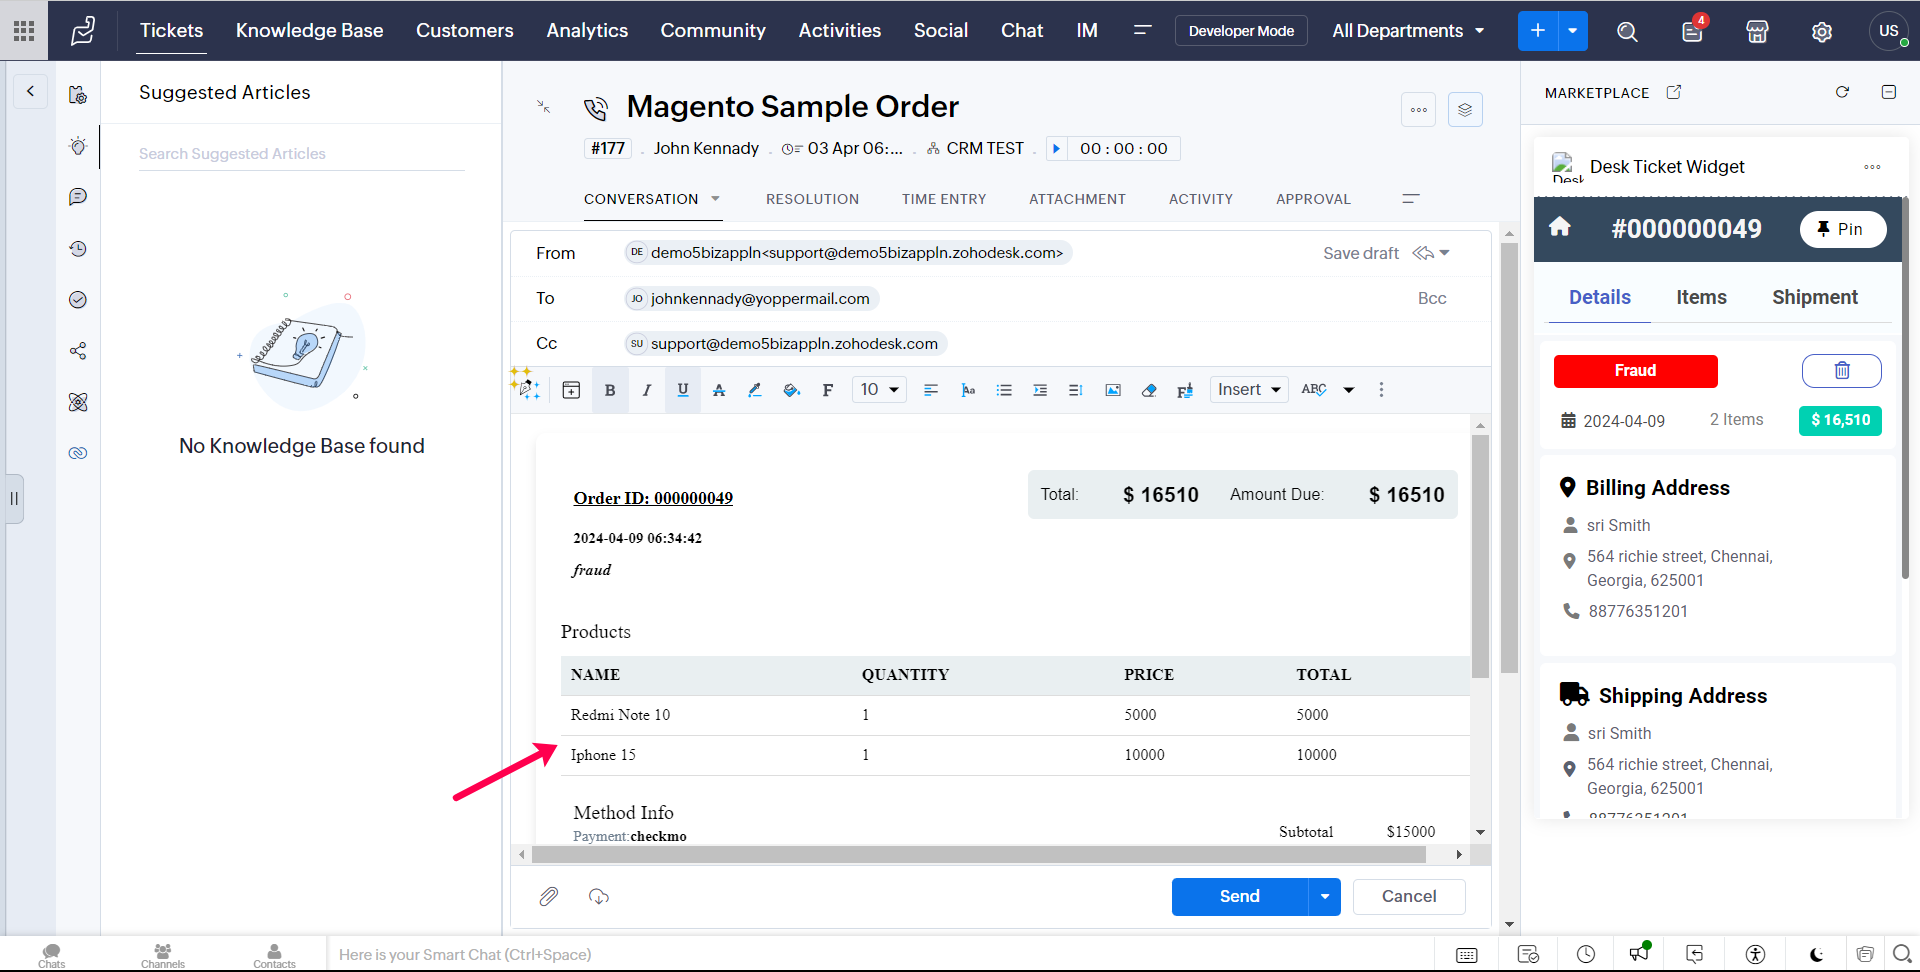
3. You can remove that order Details from mail by clicking Trash icon.
4. You can also share Shipment details via email by clicking the Reply button on Shipment Tab.
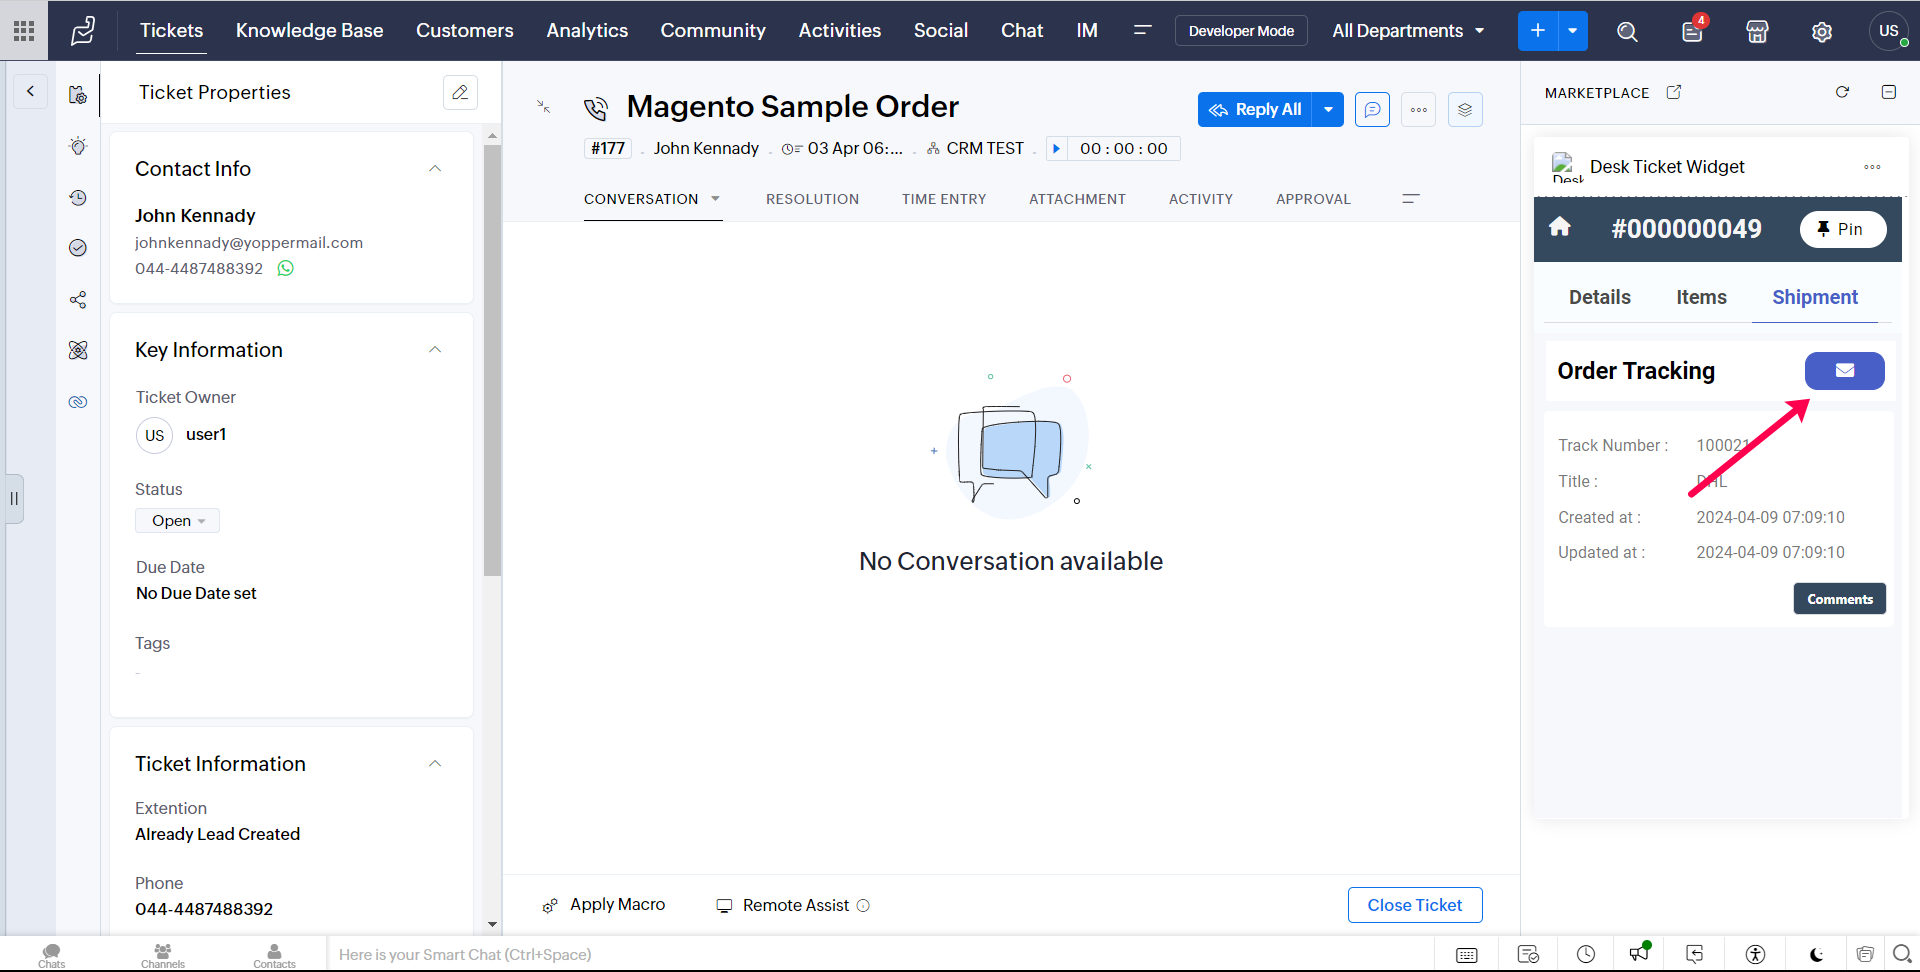
5. Once You Click Reply Button, It Will add Shipment Details on the Mail.
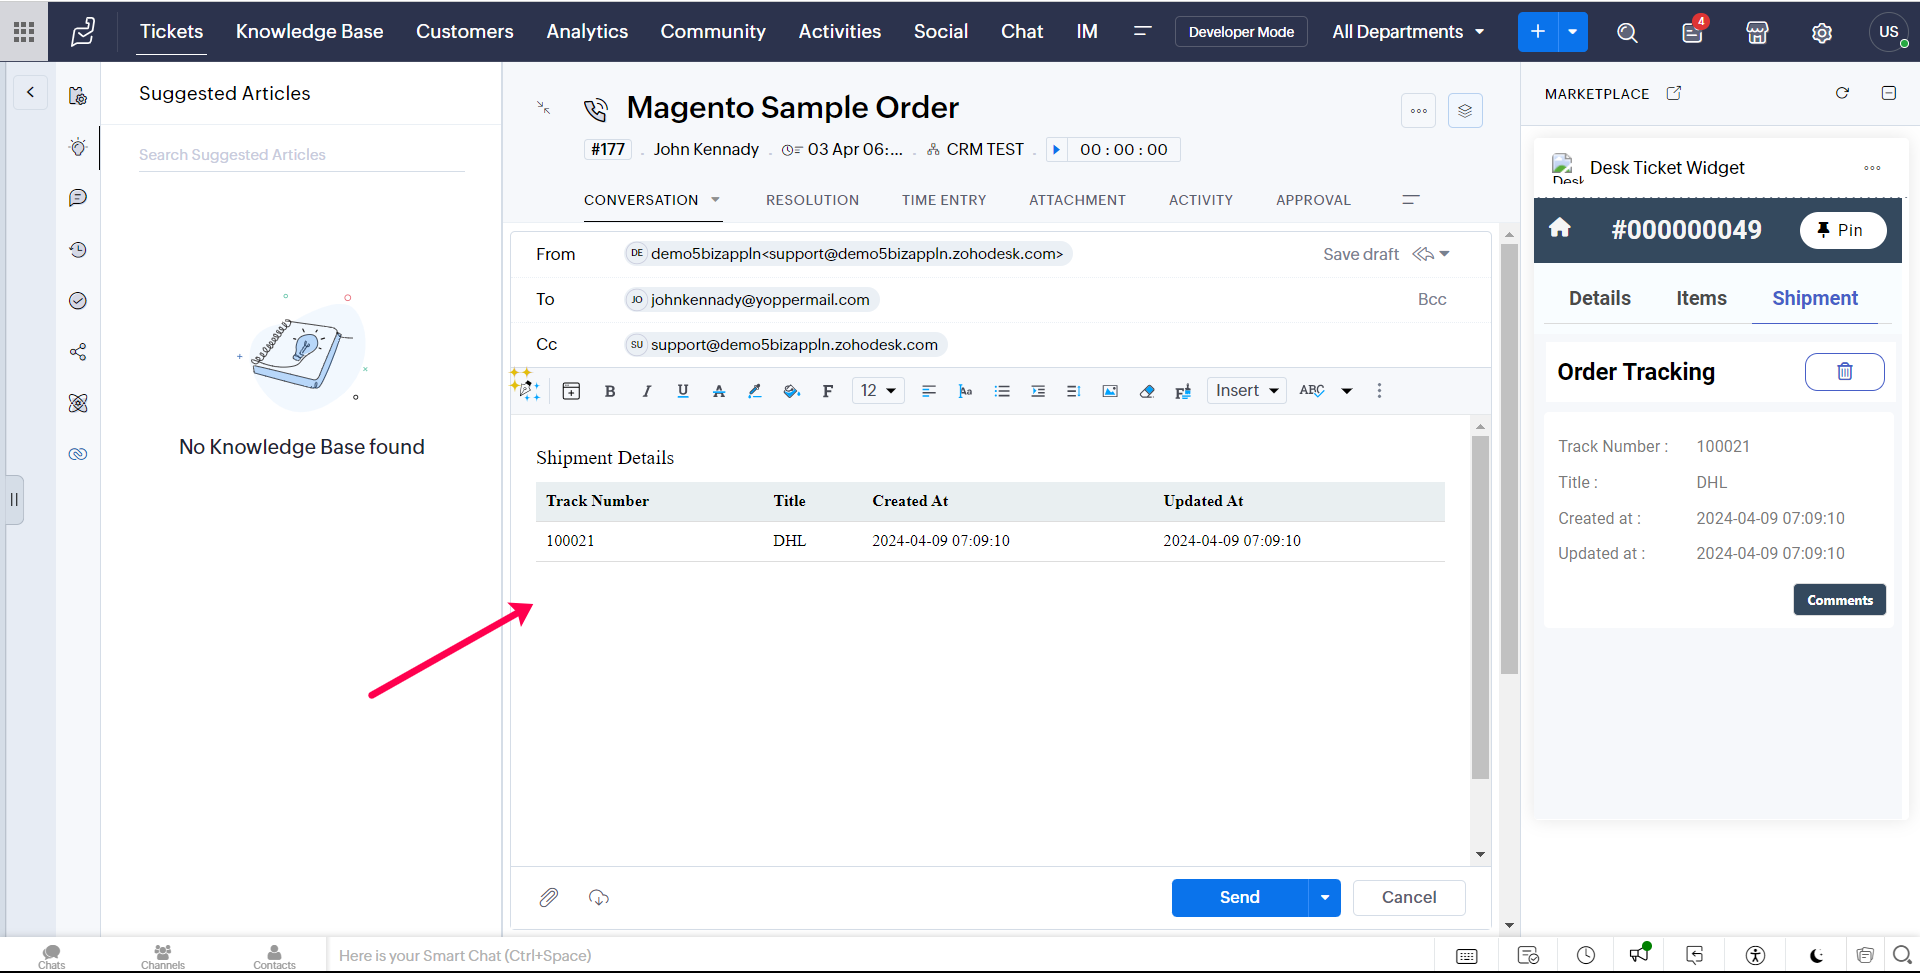
6. You can remove that shipment Details from mail by clicking Trash icon.
Note :You cannot use this Reply functionality in the Customer module.
Add Order Comments
1. You can add comments to your order by clicking the +Add button on Order Details Tab.
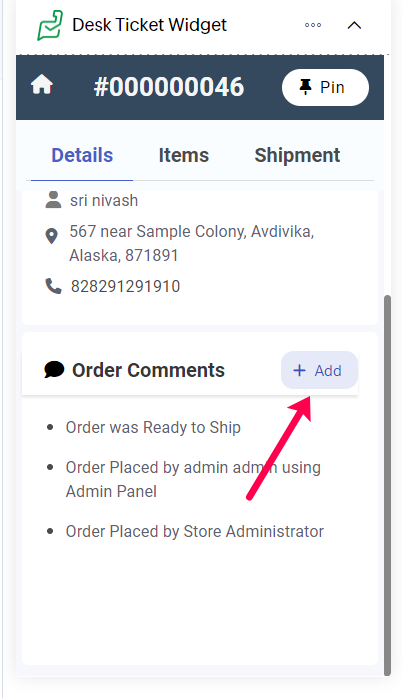
2. After clicking that button, it will display the Order Comments dialog box,and enter the Order comment then click Post.
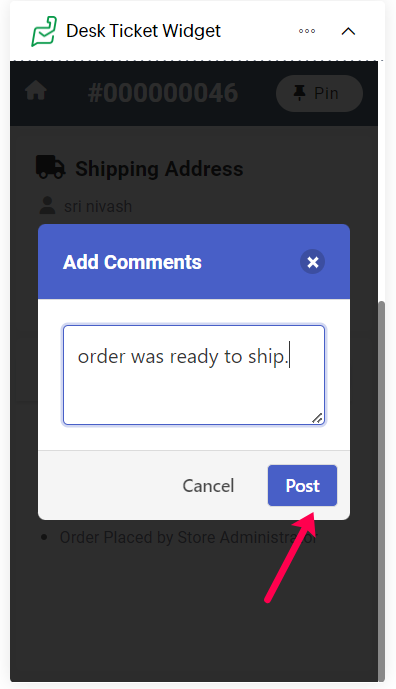
3. Once Post,It Will Show the Popup to "Comments Added successfully".
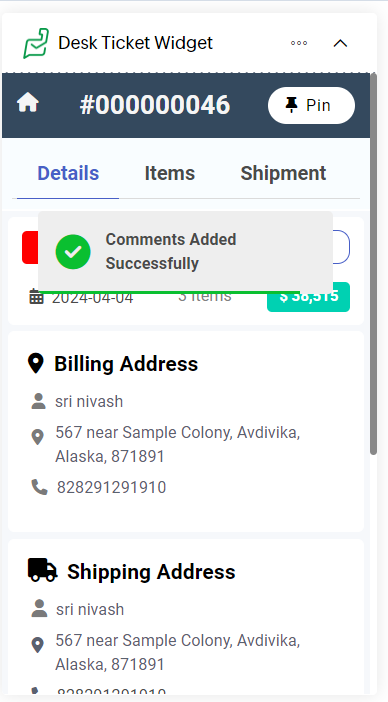
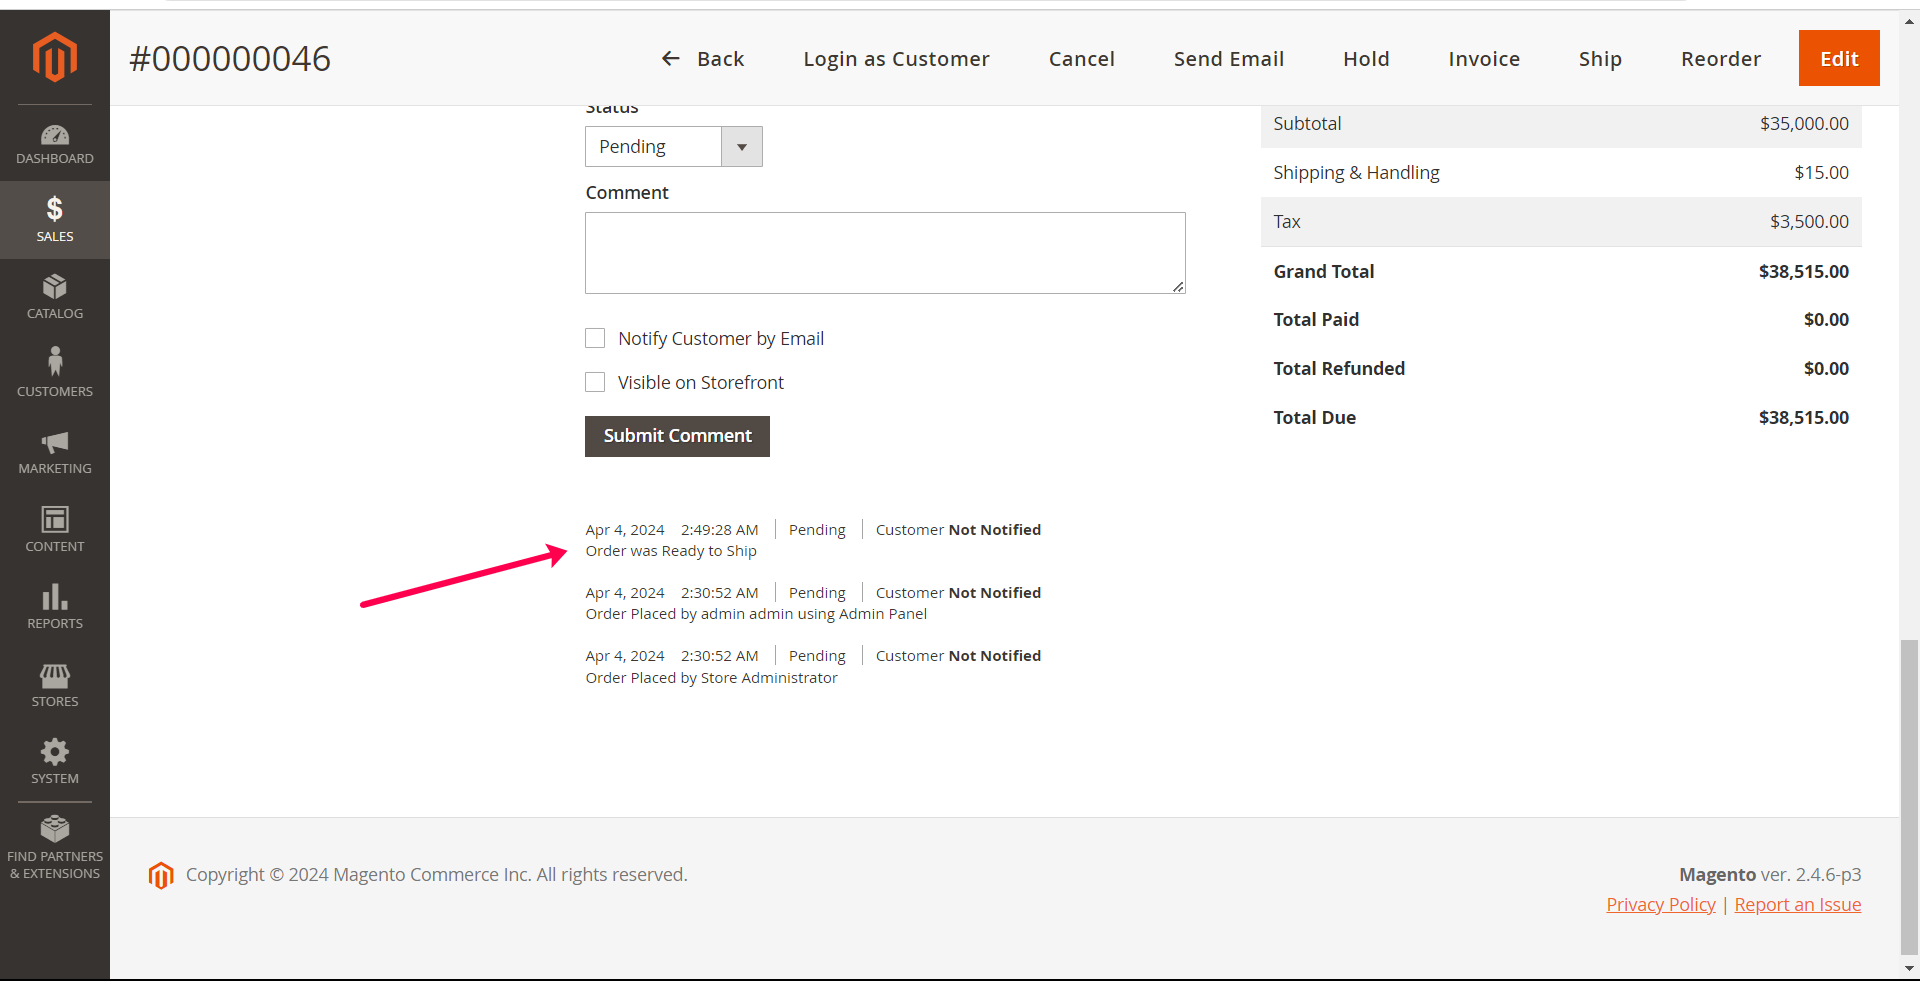
4. You can see the comment of that order in your Magento store.
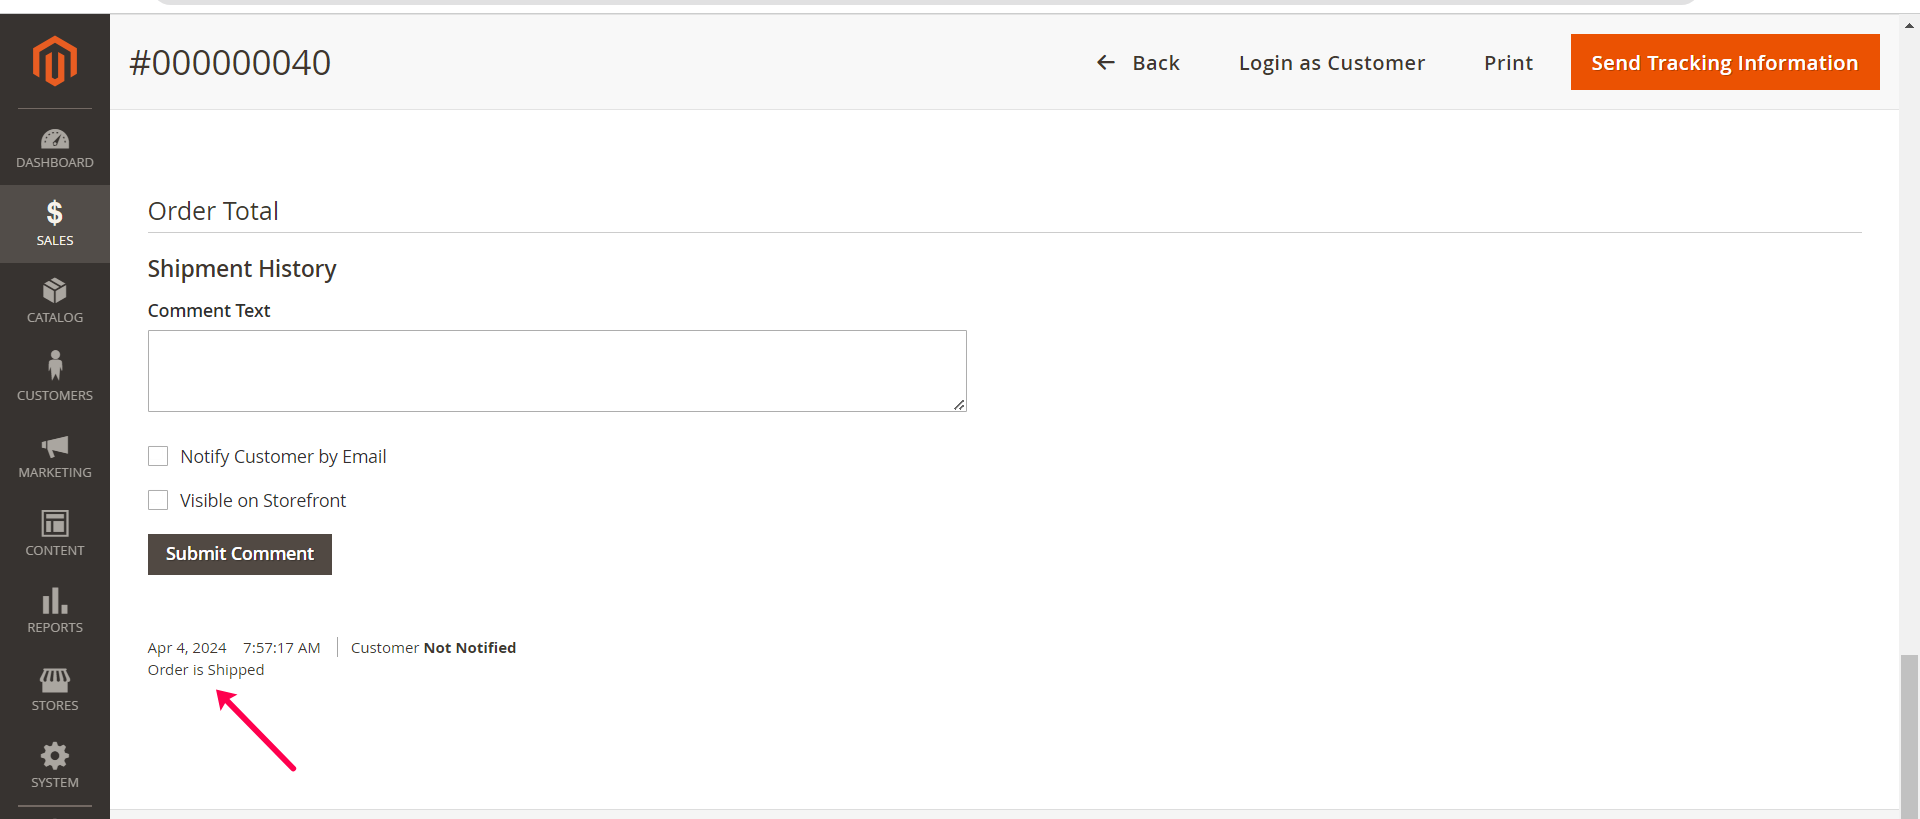
Add Shipment Comments
1. You can also add shipment comments to your Shipment by clicking the Comment button on Shipment tab.
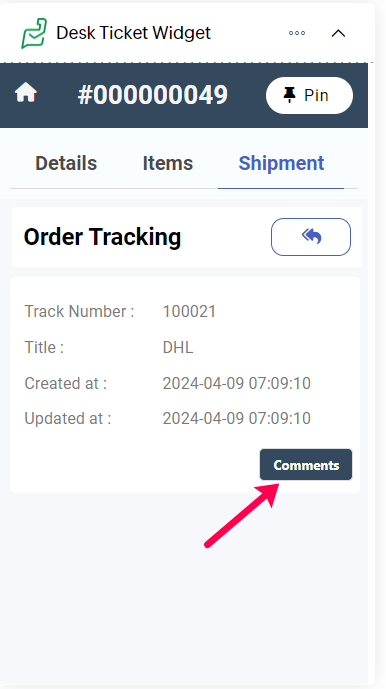
2. After clicking on that comment button it will show Shipment comment dialog box, enter the Comment and click Post.

3. Once Post,It Will Show the Popup to "Shipment Comments Added successfully".
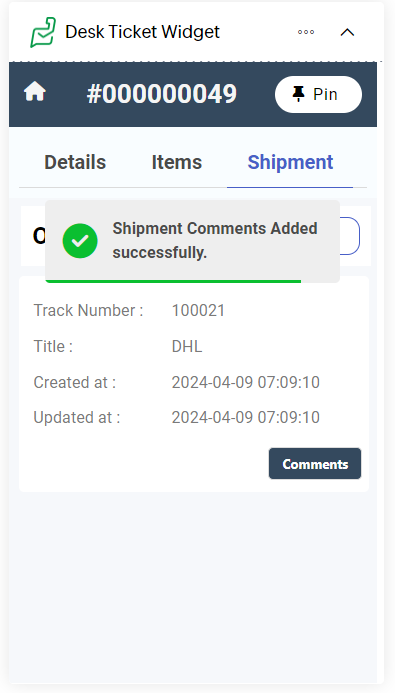
4. You can see the Shipment comment of that order in your Magento store.
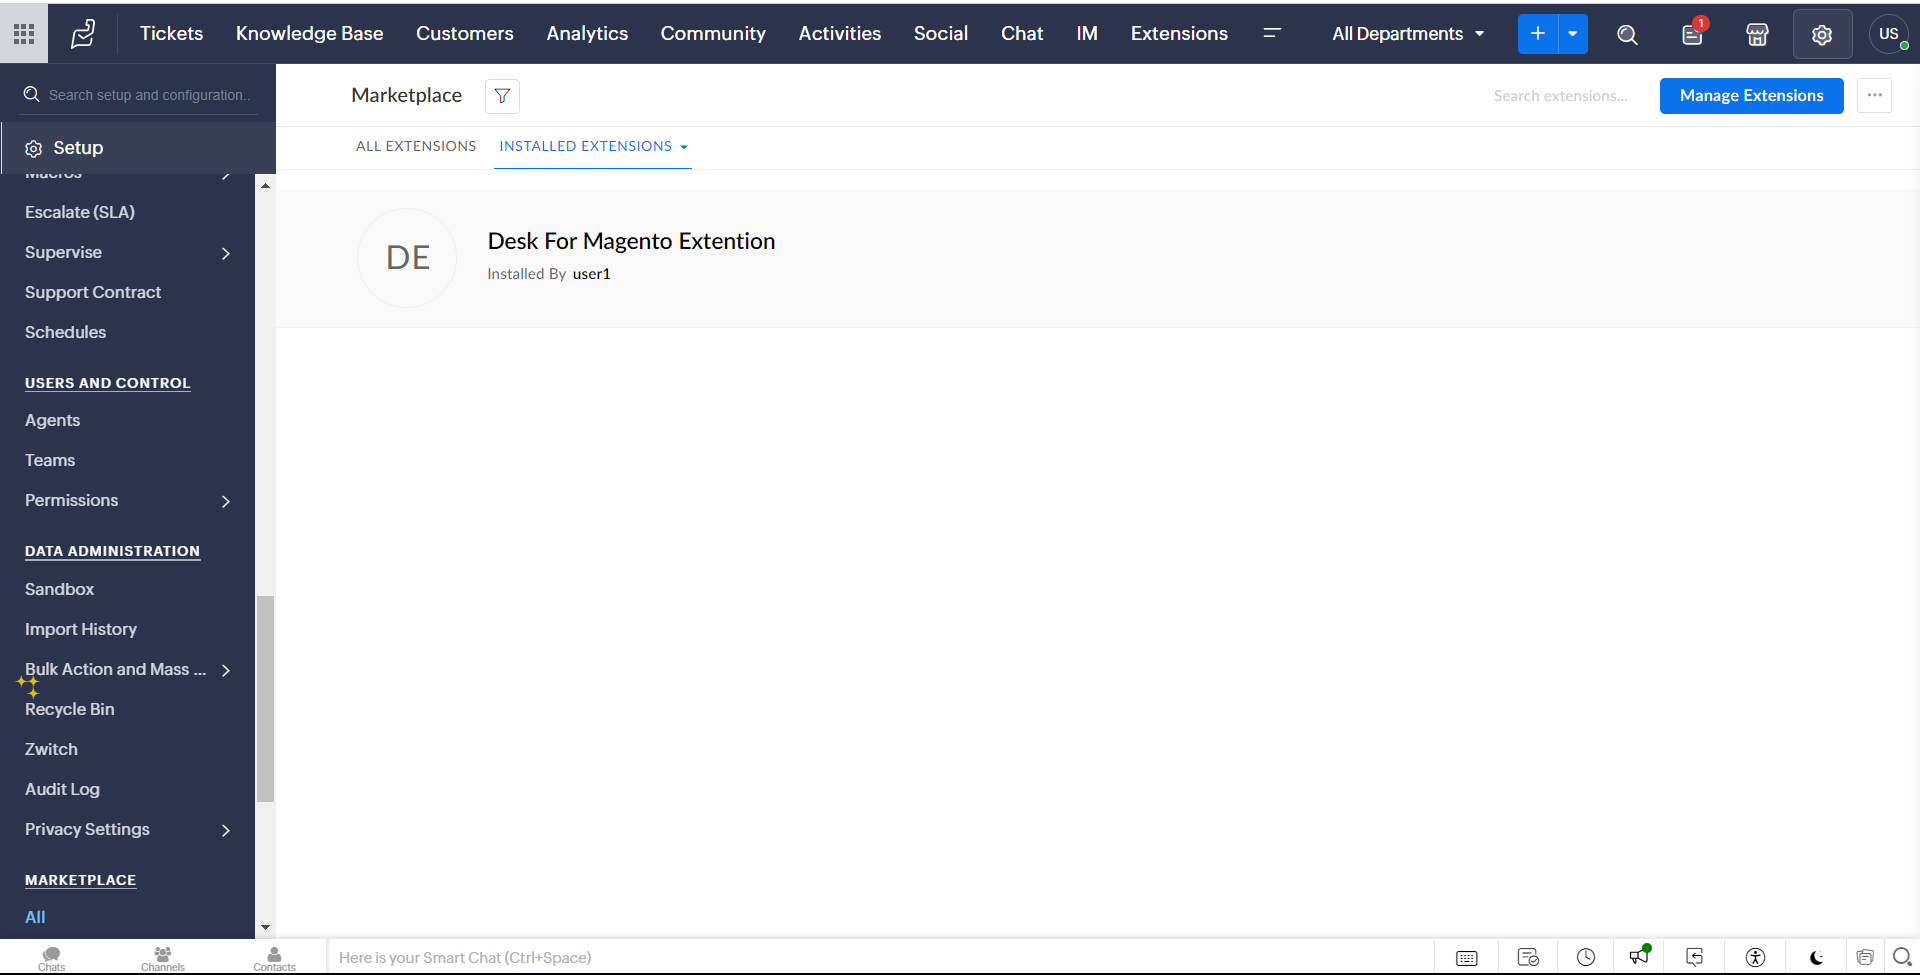
Uninstall the Extenstion
- 1. If you want to uninstall the Extension go to setup > Marketplace >All > Installed Extenstion
-
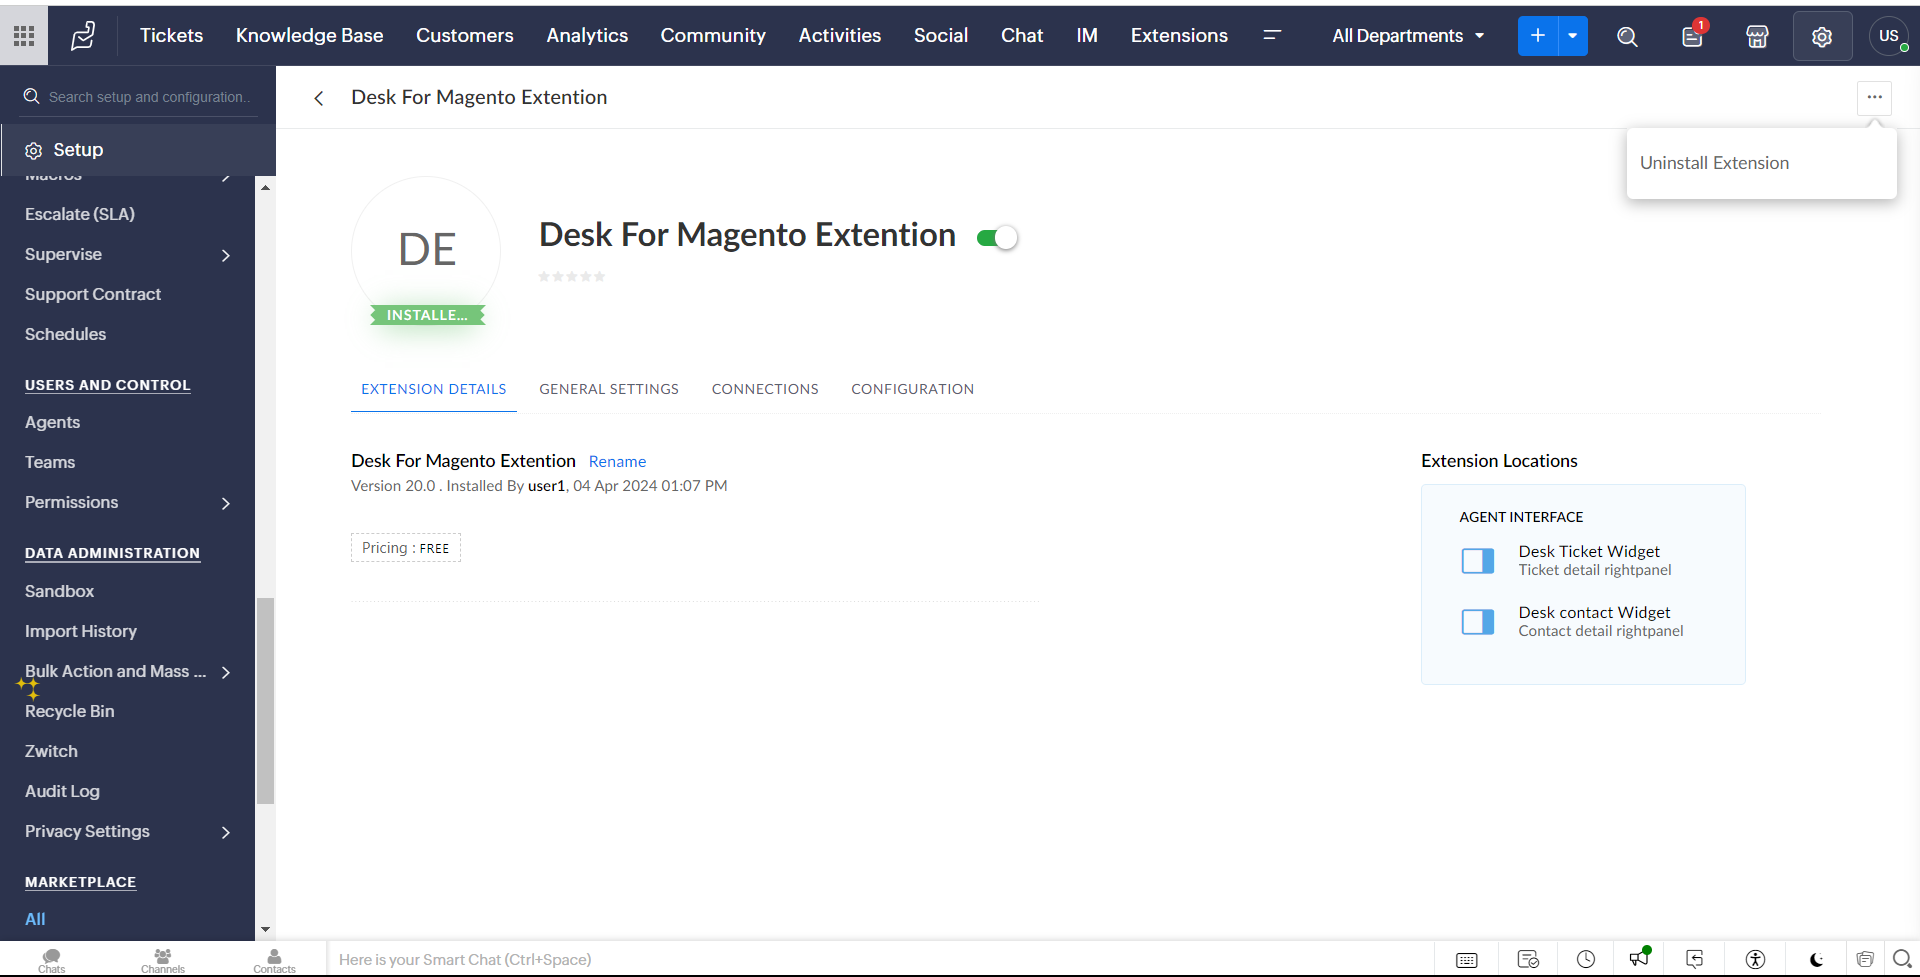
2. You see our extension and select our extension
3. Once the extension is selected, you can click "..." to uninstall the extension.
Contact us
Need any Help in Installing the Extension?
- For any doubts/queries, feel free to reach out to us.